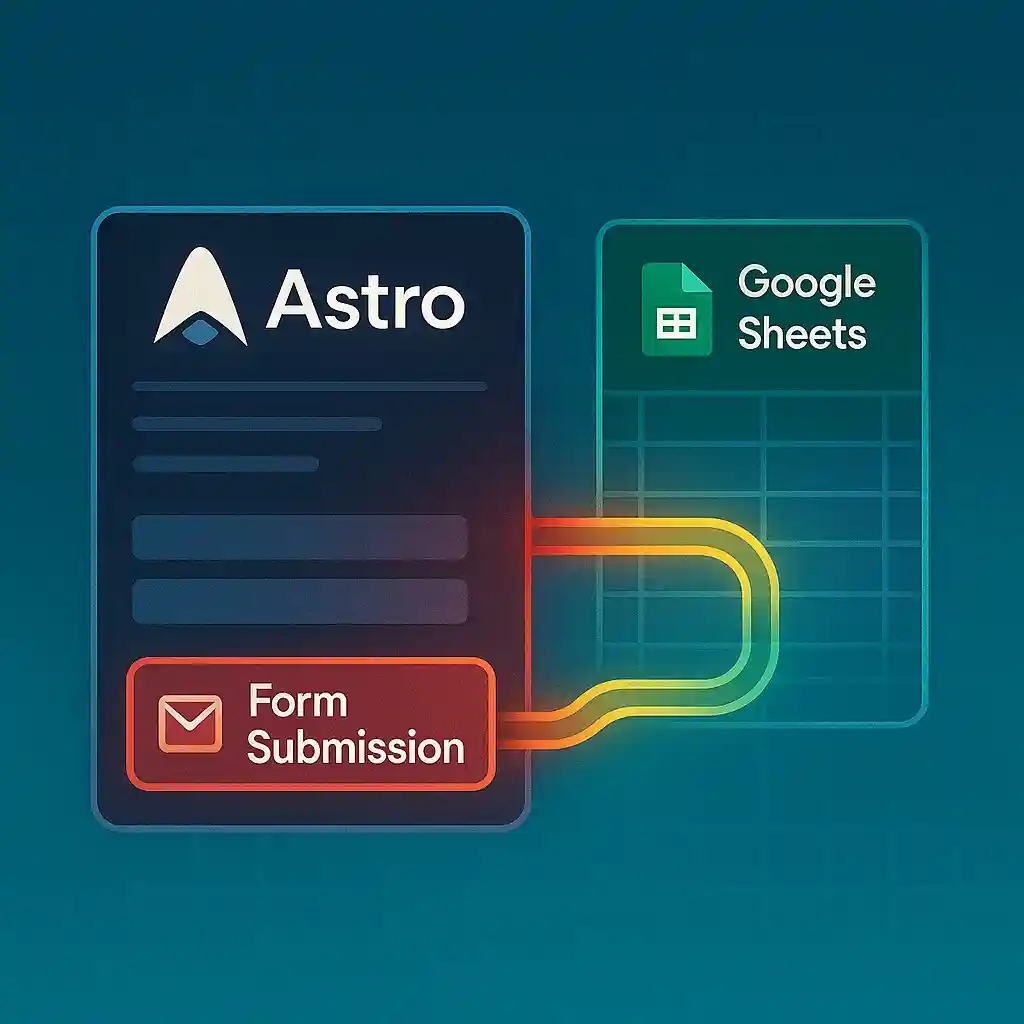
Use Post Requests To Send Form Data To A Google Sheet
Looking for a simple, cost effective way to store form submissions from your website? Google Sheets offers an accessible solution that requires minimal setup. This guide walks you through creating a secure connection between your AstroJS website and Google Sheets, allowing you to collect and organize form data without complex database management.
Published on:Why Google Sheets Is an Ideal Form Database Solution
Google Sheets provides an excellent solution for storing form data, especially for smaller projects or when you need a quick setup. Unlike traditional databases that might require complex configuration, Google Sheets offers several advantages:
-
Zero infrastructure costs - The free tier is very generous
-
Familiar spreadsheet interface that most team members can navigate
-
Built-in collaboration tools for sharing and editing data
-
Easy export options to CSV, Excel, or other formats
-
Automatic cloud backup of all your submissions
-
Simple filtering and sorting capabilities
While not suitable for high-traffic applications processing thousands of submissions daily, Google Sheets works perfectly for most small to medium websites collecting contact information, feedback, or other form data.
What You’ll Build in This Tutorial
In this tutorial, we’ll create a complete system that:
- Securely authenticates with Google’s API
- Sends form data from an AstroJS website to a Google Sheet
- Validates form inputs before submission
- Handles success and error states appropriately
Limited Time Launch Sale
Want to skip the setup? Our AstroJS starter template includes pre-configured form handling ready for Google Sheets integration, saving you hours of development time.
GET 60% OFF!Step-by-Step Guide: Setting Up Your Google Environment
1. Creating Your Google Sheet
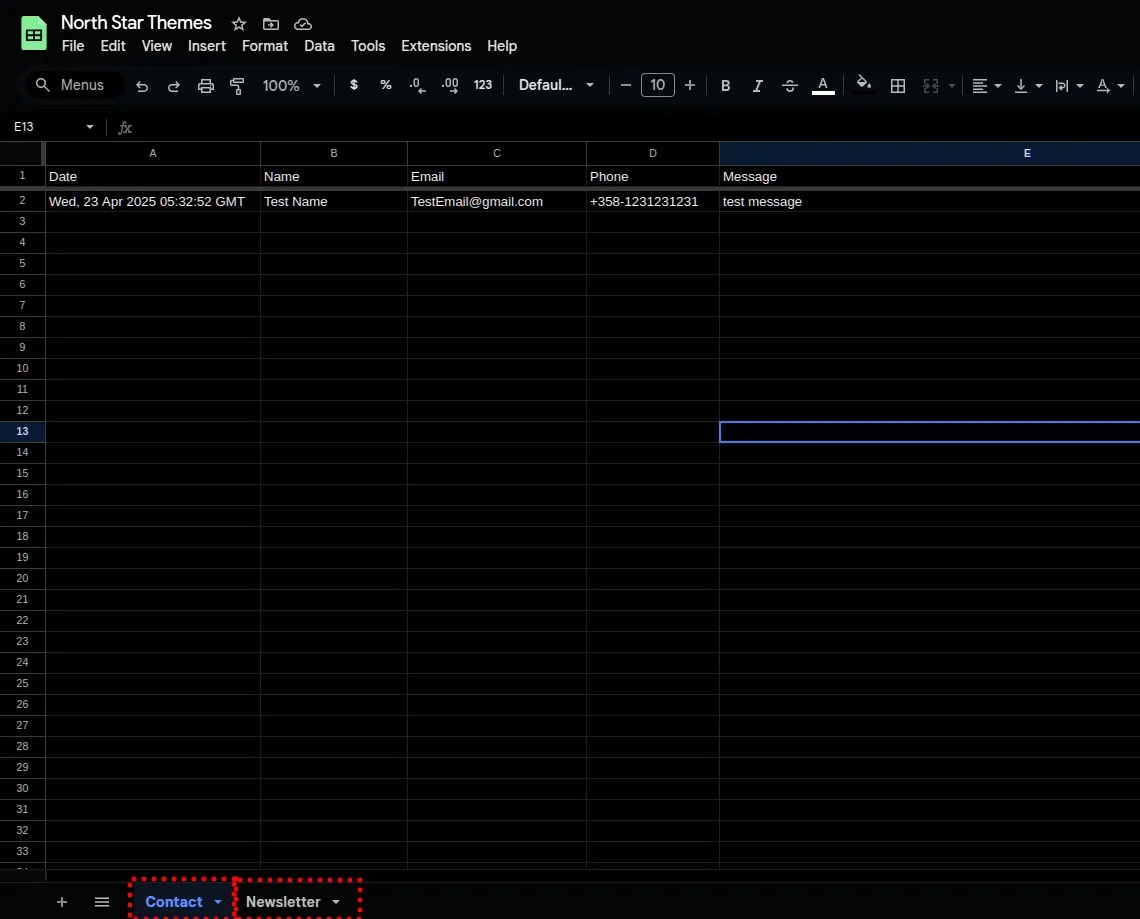
- Open Google Sheets and create a new sheet. Name the sheet as well as the sheet tab at the bottom of the sheet.
For best results, add column headers that match the data you’ll be collecting. For example, if you’re creating a contact form, your headers might be “Timestamp”, “Name”, “Email”, “Phone”, and “Message”.
2. Setting Up Google Cloud Project
-
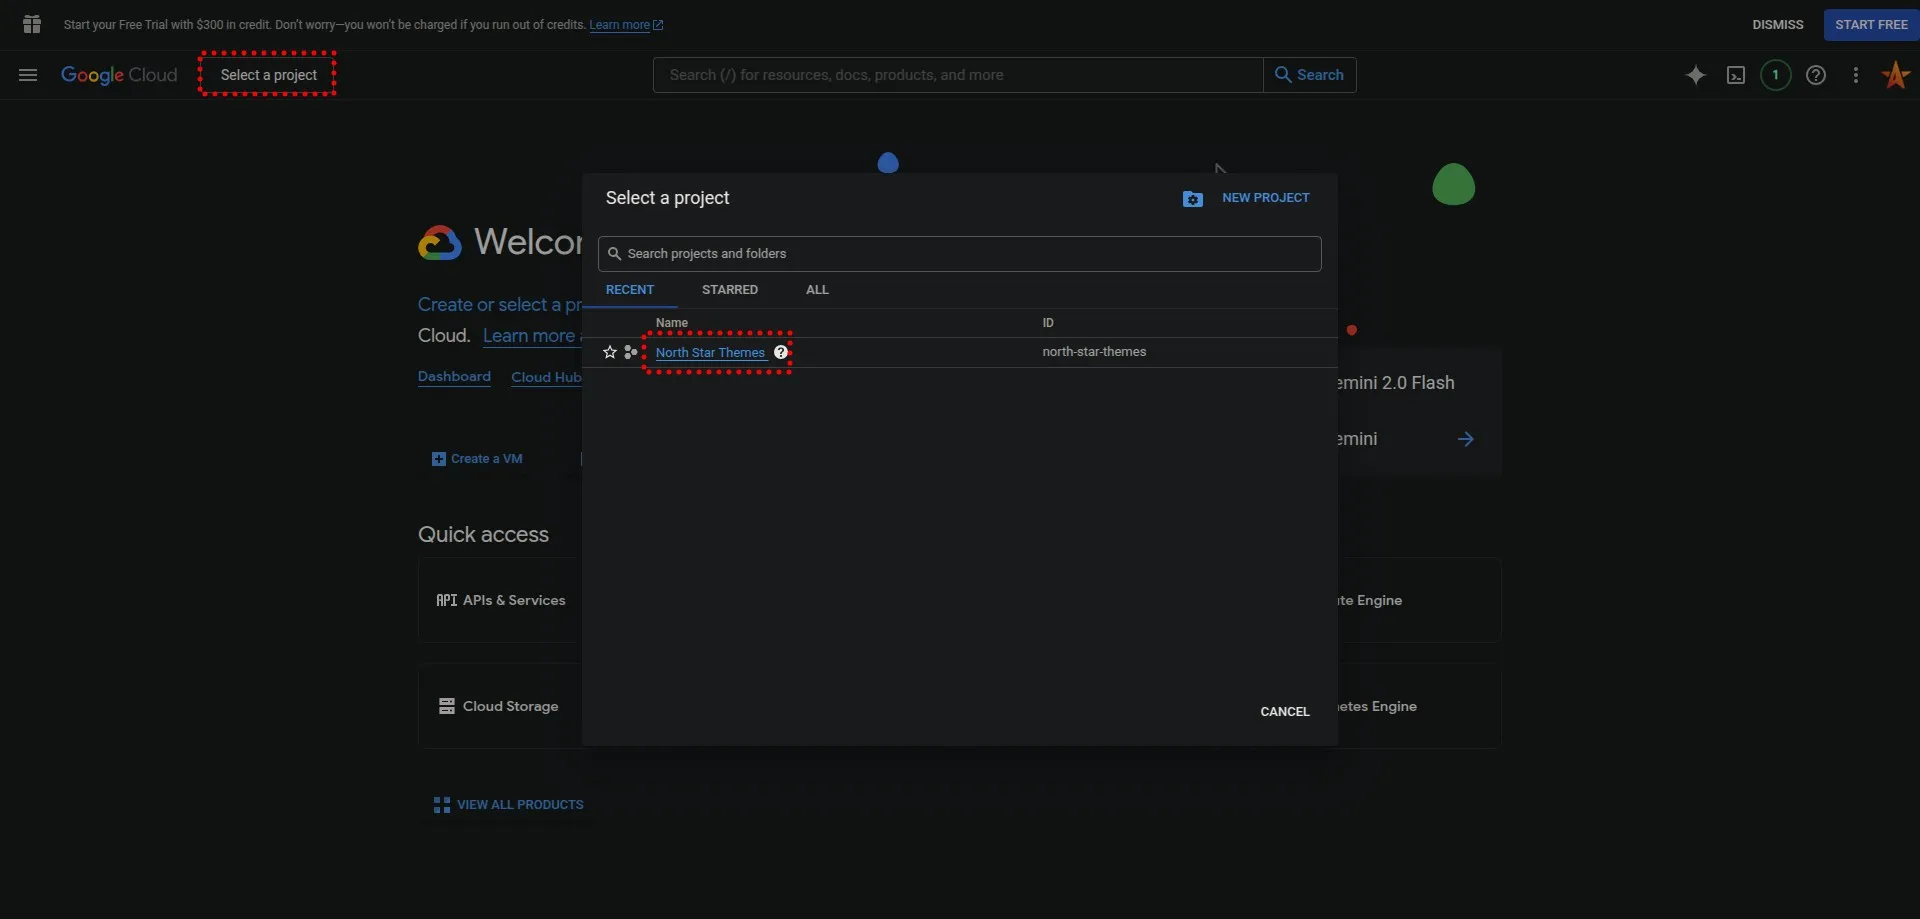
Go to Google Cloud Console
-
Click on “Select a project”

- Click on “New Project”

- Name the project and click “Create”
Choose a descriptive name related to your website or form purpose. This helps you identify the project later if you have multiple Google Cloud projects.

- Open the new project with the same “Select a project” button
Creating a Service Account for Secure API Access
A service account acts as a bot that will interact with your Google Sheet on behalf of your website:
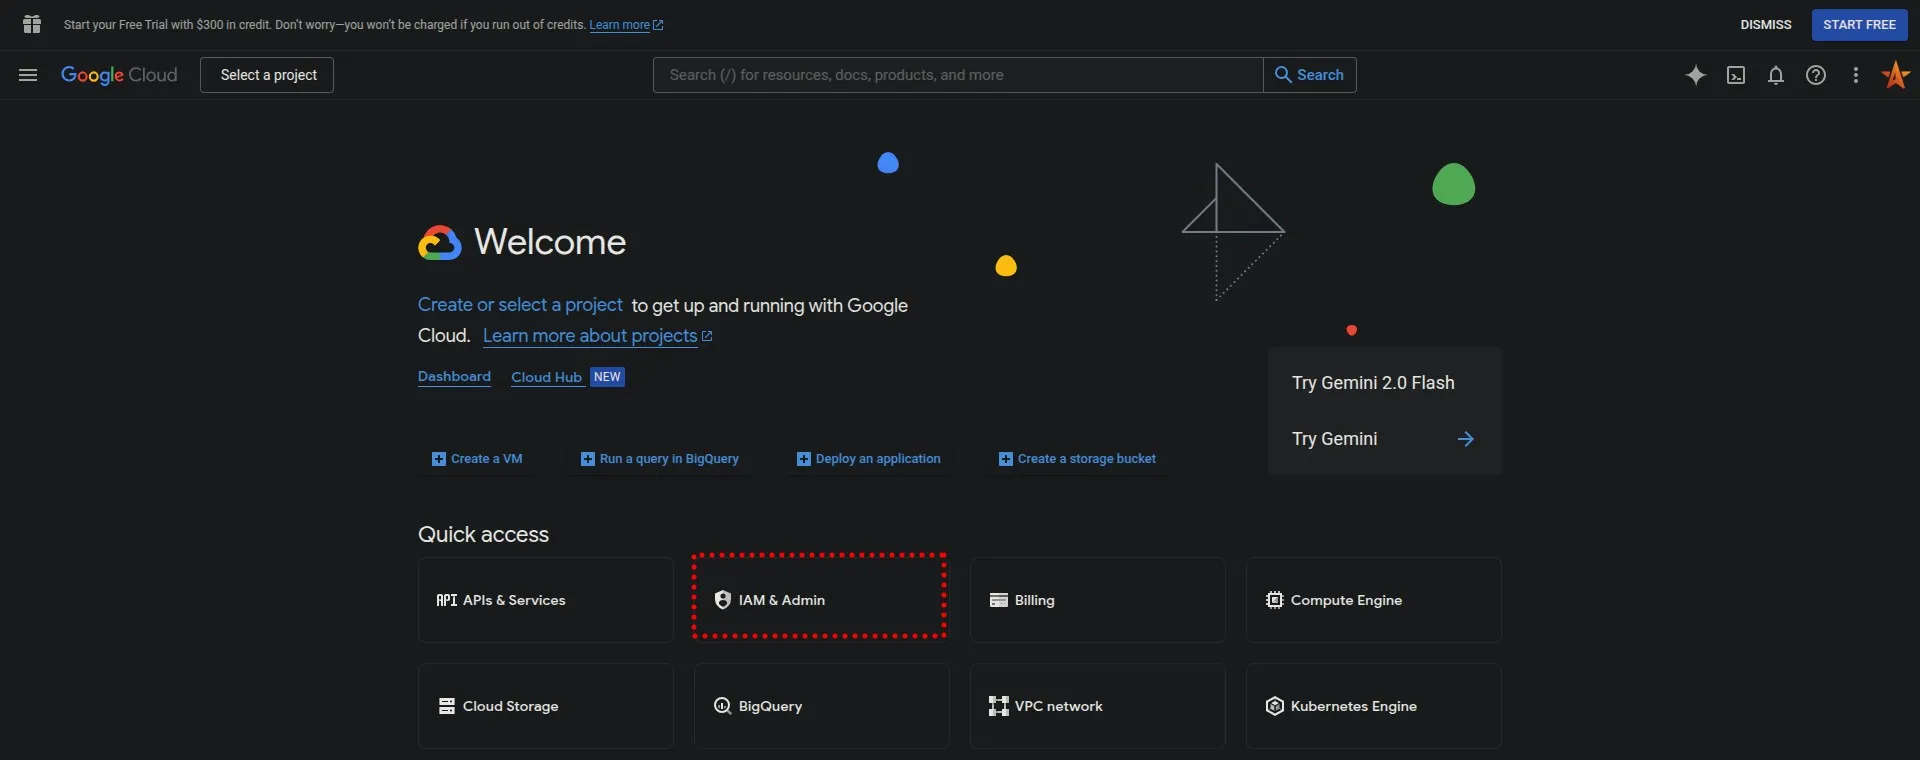
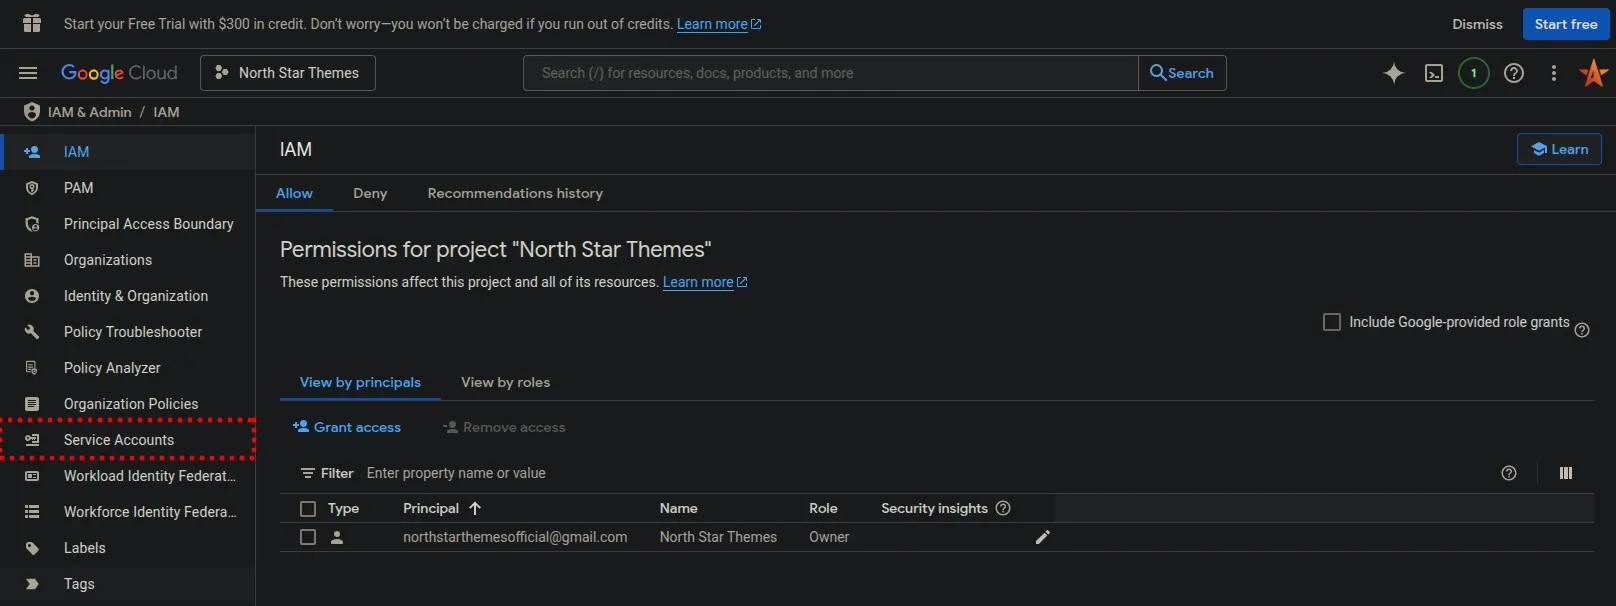
- Click on “IAM & Admin”
- Click on “Service Accounts”
- Click on “Create Service Account”
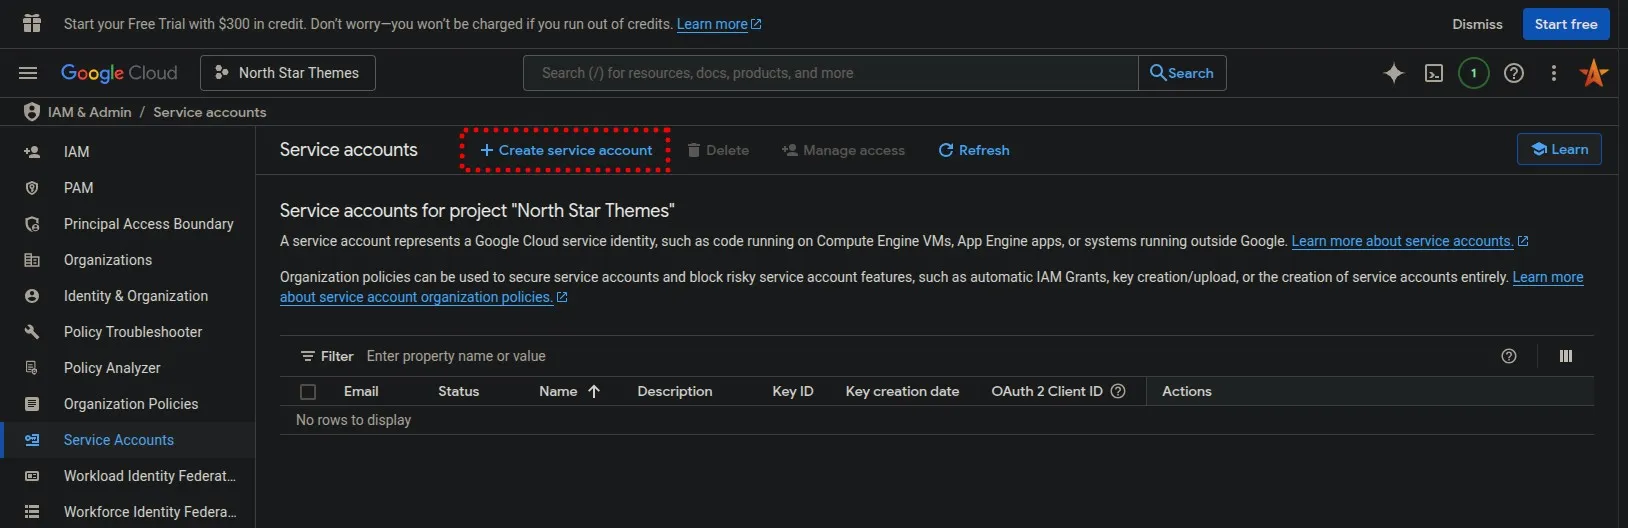
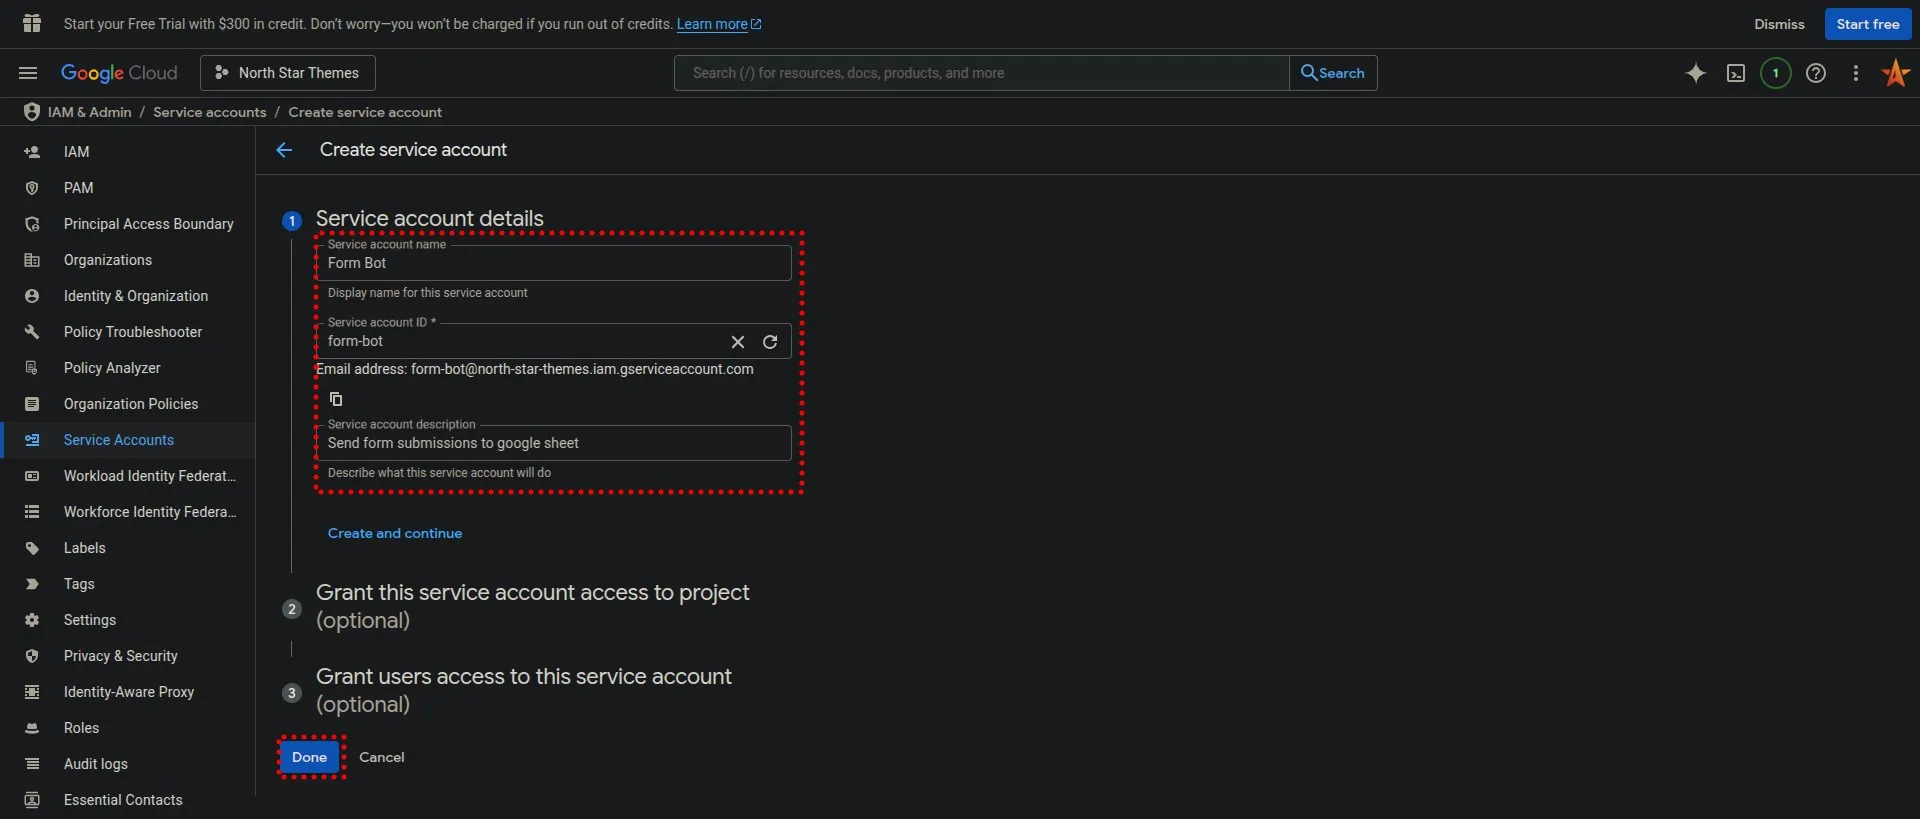
- Name the service account and click “Create”
Give your service account a descriptive name like “form-submission-bot” so you can easily identify its purpose.
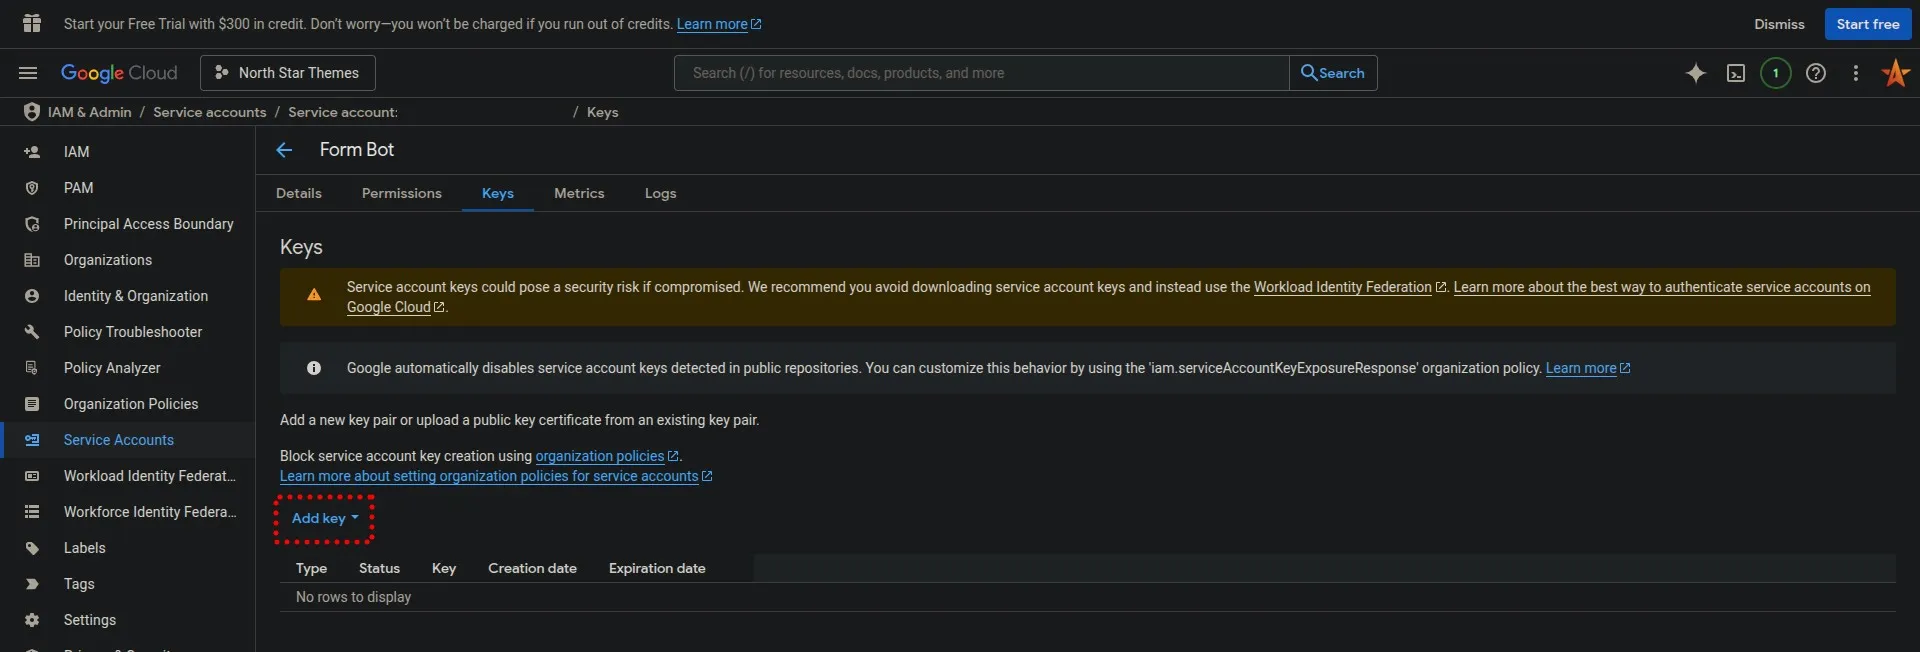
- Click on “Manage keys”
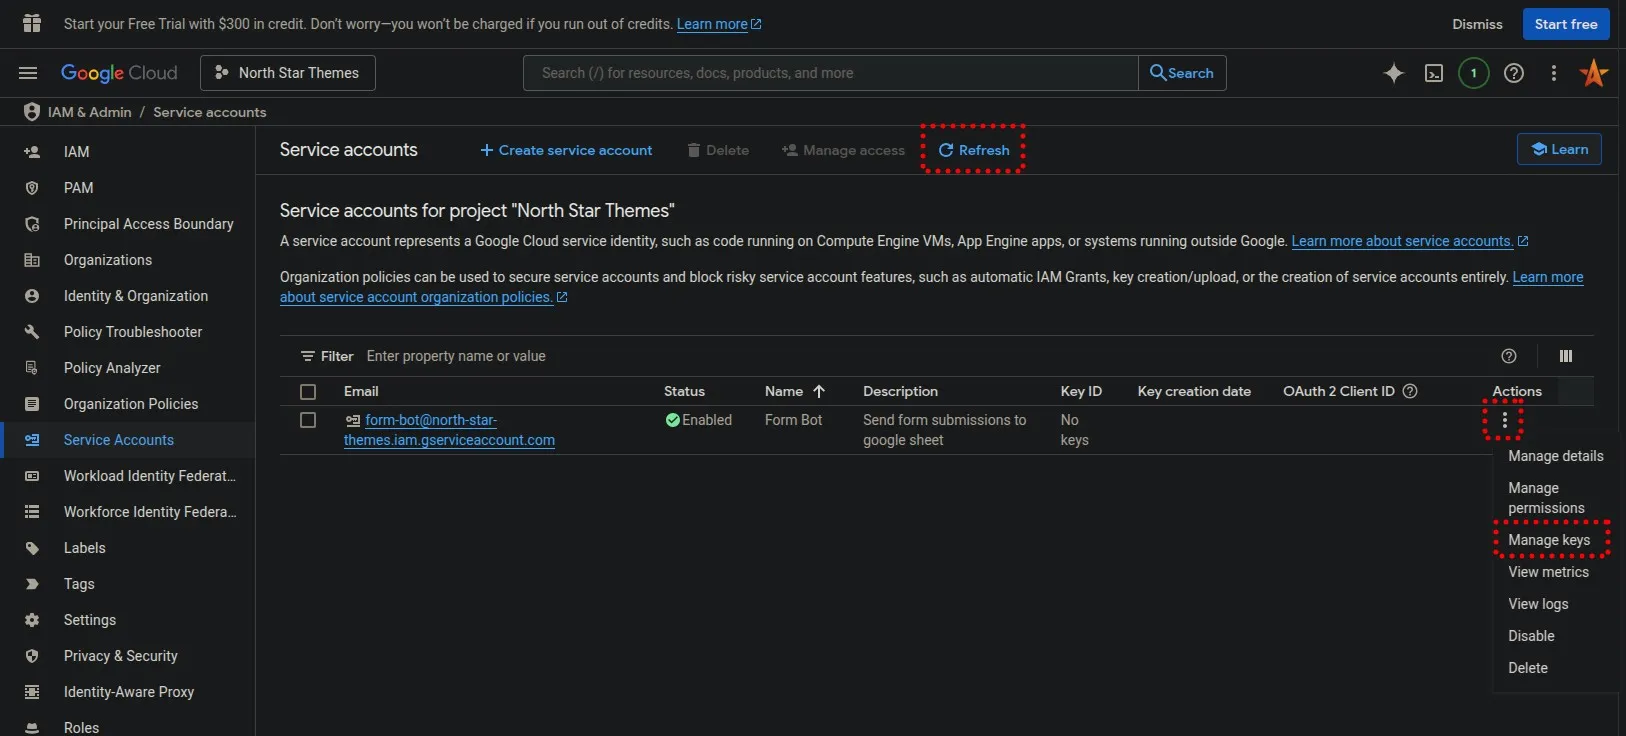
- Click on “Add key”, select “JSON” and click “Create”. This will save the JSON file to your computer with your credentials.
This JSON file contains sensitive information that grants access to your Google account’s resources. Never commit this file to a public repository or share it publicly.
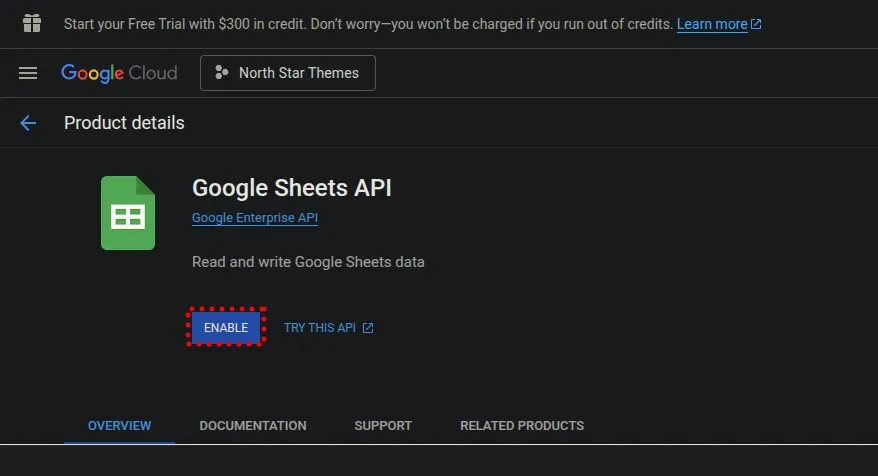
Enabling the Google Sheets API for Your Project
- Go back to the Google Cloud Console and click on “APIs and Services”. In the search bar type “Google Sheets API”
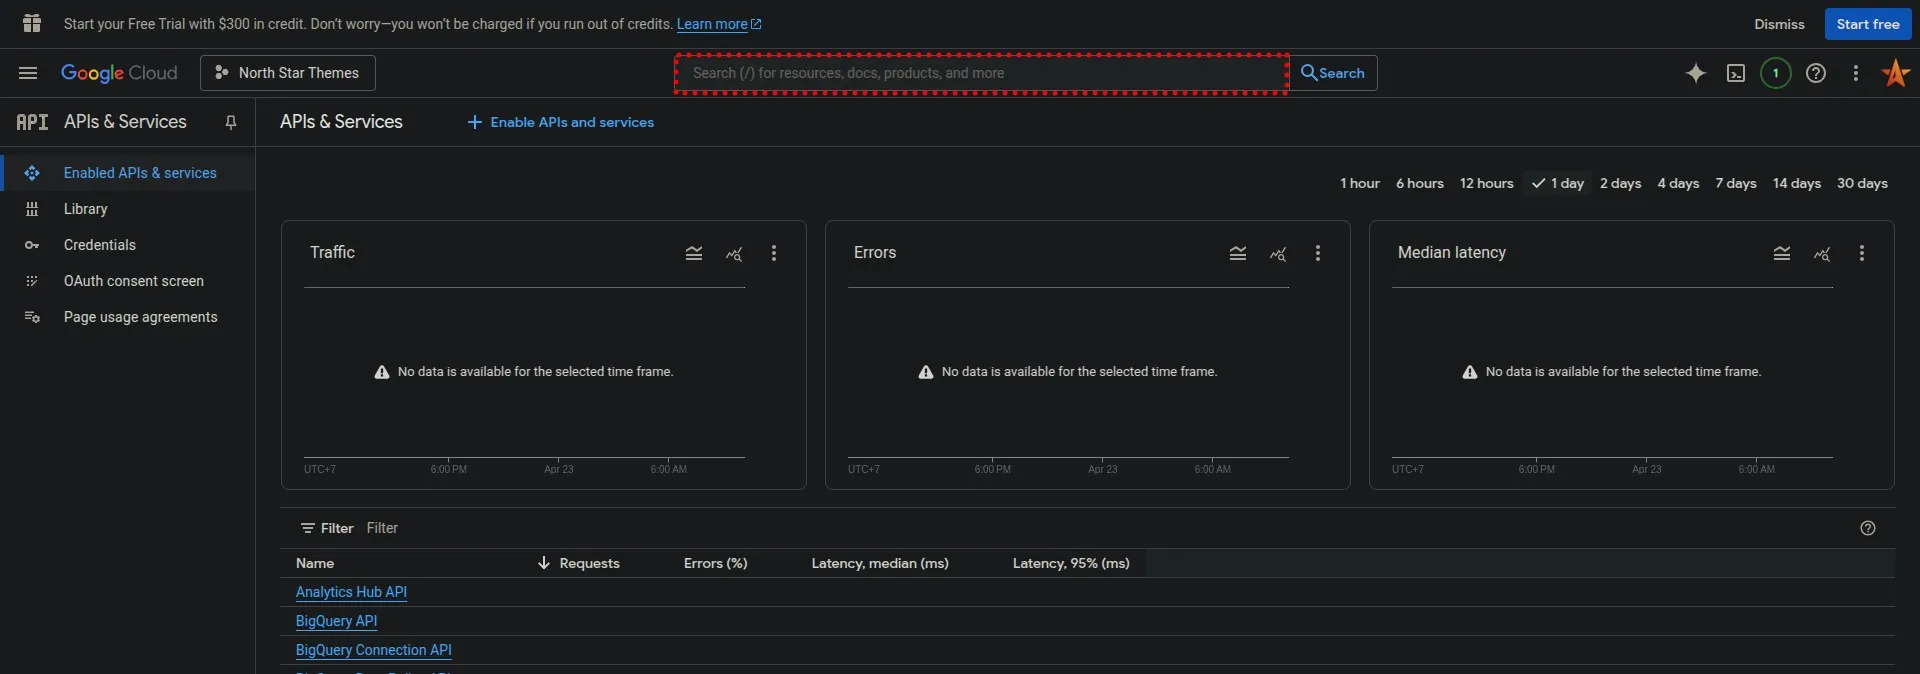
- Click on “Google Sheets API”
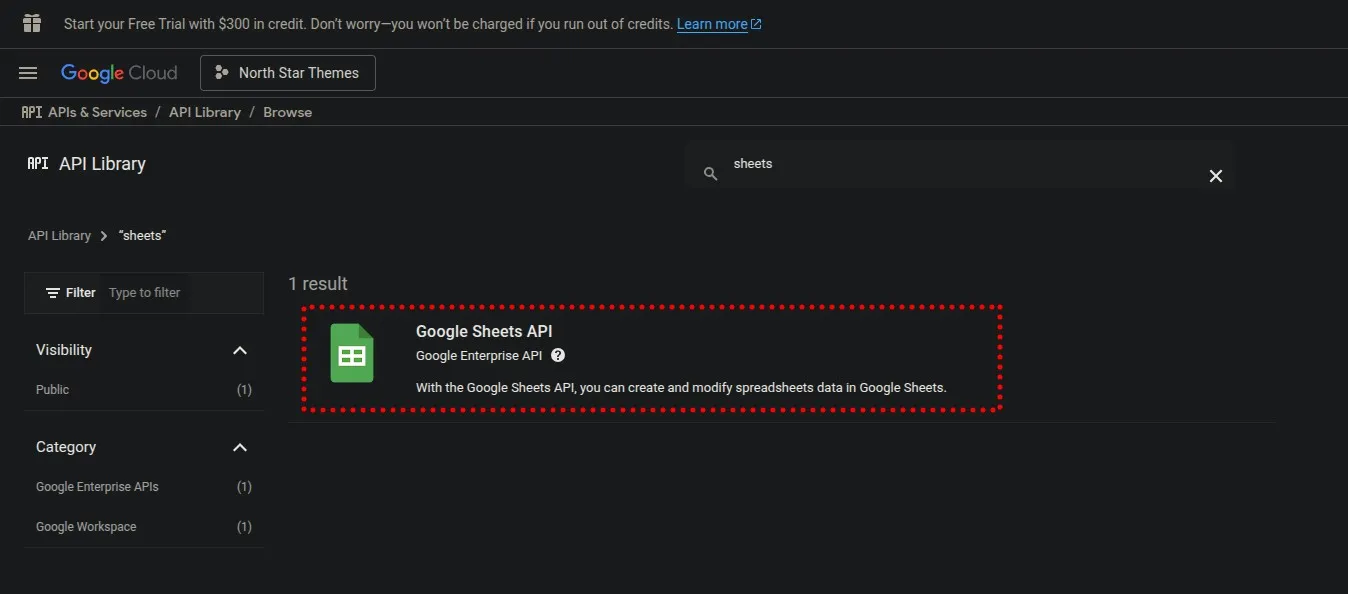
- Click “Enable”
This allows your service account to interact with Google Sheets through the API.
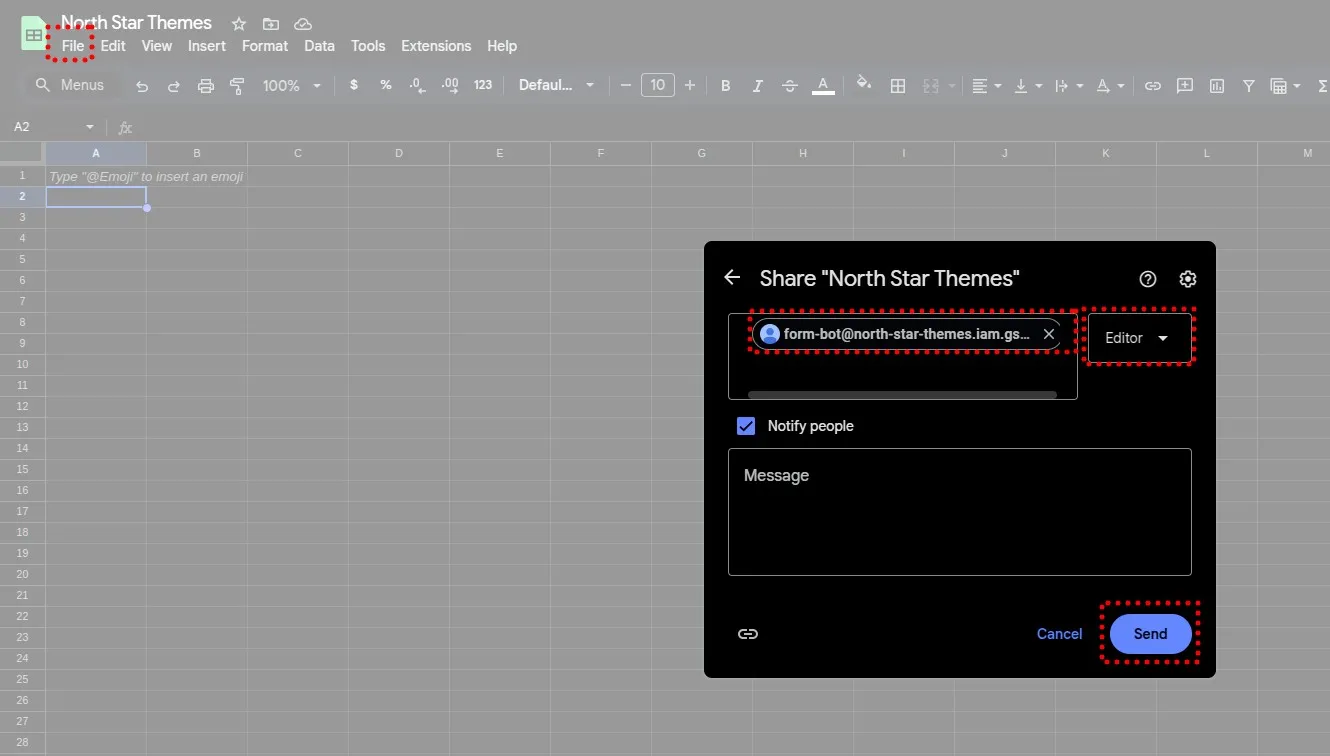
Sharing Your Sheet with the Service Account
- Open the Google Sheet and click “File” -> “Share” -> “Share with others”. Add the form bot as an editor. The email for the form bot is on the console page and in the credentials JSON file.
This step is crucial - without proper sharing permissions, your service account won’t be able to write data to the sheet.
Implementing the Code in Your AstroJS Project
1. Setting Up Environment Variables
- Create new environment variables using the credentials from the JSON file, and add the id from the sheet url:
https://docs.google.com/spreadsheets/d/<id>
PUBLIC_GOOGLE_SHEET_ID=PRIVATE_GOOGLE_SHEET_CREDENTIALS_PROJECT_ID=PRIVATE_GOOGLE_SHEET_CREDENTIALS_PRIVATE_KEY_ID=PRIVATE_GOOGLE_SHEET_CREDENTIALS_PRIVATE_KEY=PRIVATE_GOOGLE_SHEET_CREDENTIALS_CLIENT_EMAIL=PRIVATE_GOOGLE_SHEET_CREDENTIALS_CLIENT_ID=PRIVATE_GOOGLE_SHEET_CREDENTIALS_CLIENT_X509_CERT_URL=2. Installing Required Dependencies
- Install the
web-auth-library
npm install web-auth-libraryThis library simplifies the OAuth authentication process with Google’s APIs.
Creating the Google Sheets Integration Service
-
Create a new file
src/lib/server/google-sheets.ts -
Add the following code to the file. This is a reusable function if you want to append data to different sheet tabs within the same sheet project. The names are case sensitive. It will append the data to the first empty row of the sheet. If there’s no empty rows, it will create a new row at the end of the sheet.
import { getAccessToken } from 'web-auth-library/google';
export async function appendToSheet({ sheetName, data }: { sheetName: string; data: string[] }) { try { const accessToken = await getAccessToken({ credentials: JSON.stringify({ type: 'service_account', project_id: import.meta.env.PRIVATE_GOOGLE_SHEET_CREDENTIALS_PROJECT_ID, private_key_id: import.meta.env.PRIVATE_GOOGLE_SHEET_CREDENTIALS_PRIVATE_KEY_ID, private_key: import.meta.env.PRIVATE_GOOGLE_SHEET_CREDENTIALS_PRIVATE_KEY.replace(/\\n/g, '\n'), client_id: import.meta.env.PRIVATE_GOOGLE_SHEET_CREDENTIALS_CLIENT_ID, client_email: import.meta.env.PRIVATE_GOOGLE_SHEET_CREDENTIALS_CLIENT_EMAIL, auth_uri: 'https://accounts.google.com/o/oauth2/auth', token_uri: 'https://oauth2.googleapis.com/token', auth_provider_x509_cert_url: 'https://www.googleapis.com/oauth2/v1/certs', client_x509_cert_url: import.meta.env.PRIVATE_GOOGLE_SHEET_CREDENTIALS_CLIENT_X509_CERT_URL, }), scope: 'https://www.googleapis.com/auth/spreadsheets', });
const result = await fetch(`https://sheets.googleapis.com/v4/spreadsheets/${import.meta.env.PUBLIC_GOOGLE_SHEET_ID}/values/${sheetName}!A1:append?valueInputOption=RAW`, { method: 'POST', body: JSON.stringify({ range: `${sheetName}!A1`, majorDimension: 'ROWS', values: [data], }), headers: { Authorization: `Bearer ${accessToken}` }, });
return result; } catch (error) { return error as Error; }}This function handles:
- Authentication with Google’s API using your service account credentials
- Formatting the data for insertion into your sheet
- Making the API request to append the data
- Error handling for any issues that might occur
Building a Type-Safe Form Handler with Astro Actions
- Create an Astro Action that calls the
appendToSheetfunction. Included here is a zod schema for the form data validation.
import { ActionError, defineAction } from 'astro:actions';import { appendToSheet } from '@/lib/server/google-sheets';import { z } from 'zod';
const contactFormSchema = z.object({ name: z.string(), email: z.string().email(), phone: z.string().optional(), message: z.string(),});
export const server = { 'form/contact': defineAction({ accept: 'form', input: contactFormSchema, handler: async ({ name, email, phone, message }) => { try { const result = await appendToSheet({ sheetName: 'Contact', data: [new Date().toUTCString(), name, email, phone || '', message], });
if (result instanceof Error) { throw result; }
if (result.status !== 200) { throw new Error(`Response status: ${result.status}: ${result.statusText}`); }
return { success: true }; } catch (error) { if (error instanceof Error) { throw new ActionError({ code: 'INTERNAL_SERVER_ERROR', message: error.message, }); } } }, }),};Astro Actions provide a clean way to handle form submissions with built-in validation. The Zod schema ensures that all required fields are provided.
Creating a User-Friendly Contact Form
- Now create the form page. Our starter kit has a contact form already created in
src/pages/contact.astro
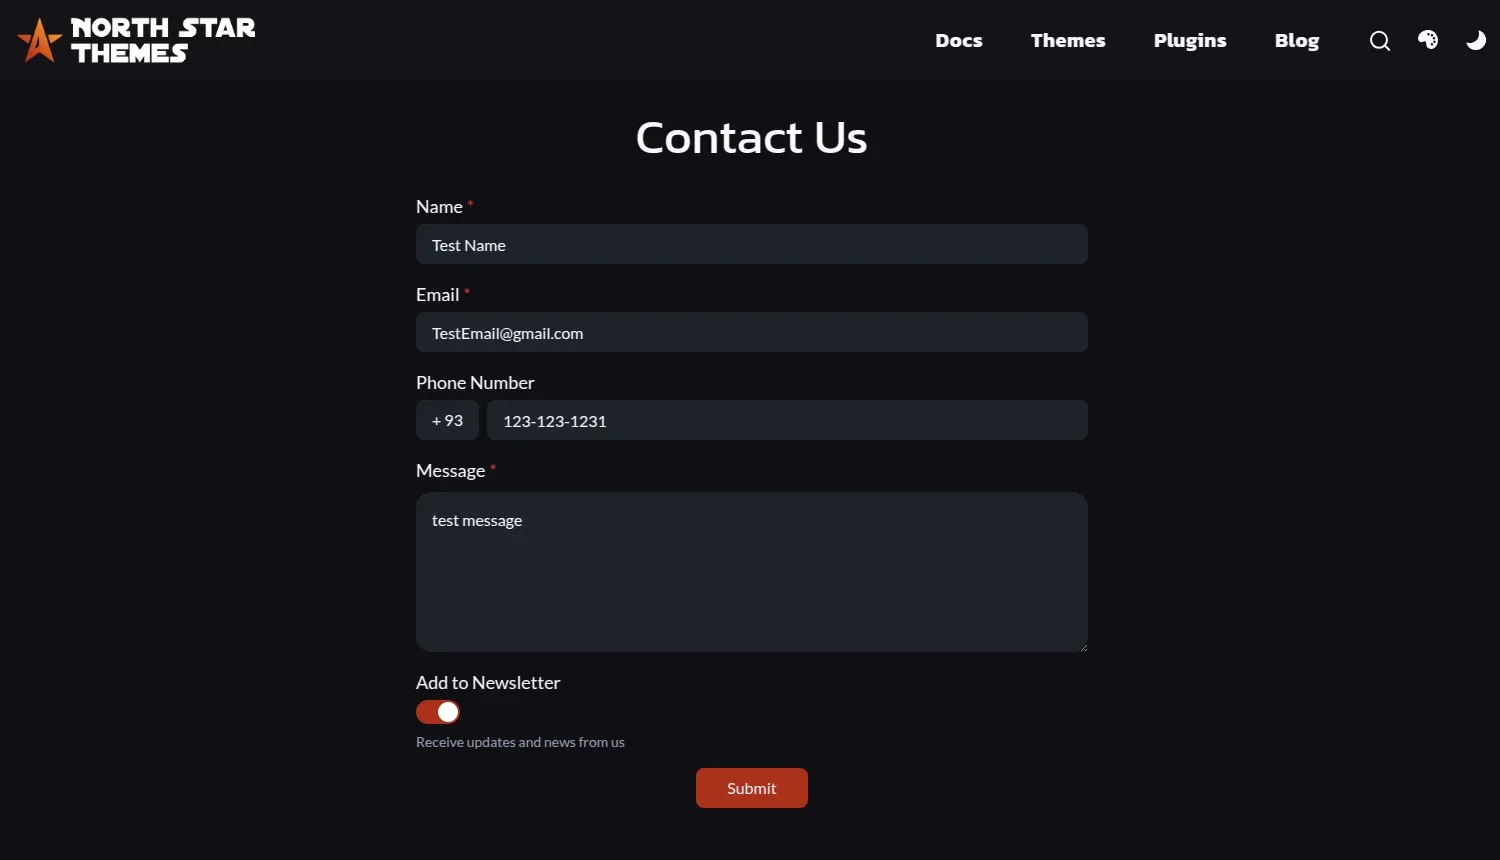
Your form HTML should include fields that match your schema. For example:
<form> <div class="form-group"> <label for="name">Name</label> <input type="text" id="name" name="name" required /> </div>
<div class="form-group"> <label for="email">Email</label> <input type="email" id="email" name="email" required /> </div>
<div class="form-group"> <label for="phone">Phone (optional)</label> <input type="tel" id="phone" name="phone" /> </div>
<div class="form-group"> <label for="message">Message</label> <textarea id="message" name="message" required></textarea> </div>
<button type="submit">Send Message</button></form>Implementing Client-Side Form Handling
- Write the script to submit the form data to the Astro Action.
<script>import { actions } from 'astro:actions';
const form = document.querySelector('form');const submitButton = form?.querySelector('button[type="submit"]');const statusMessage = document.createElement('div');statusMessage.className = 'form-status';form?.appendChild(statusMessage);
form?.addEventListener('submit', async (e) => { e.preventDefault();
// Show loading state if (submitButton) { submitButton.disabled = true; submitButton.textContent = 'Sending...'; }
statusMessage.textContent = '';
const formData = new FormData(form); const { error } = await actions['form/contact'](formData);
if (error) { // Show error message to user statusMessage.textContent = `Error: ${error.message}`; statusMessage.className = 'form-status error'; } else { // Show success message to user statusMessage.textContent = 'Thank you! Your message has been sent.'; statusMessage.className = 'form-status success'; form.reset(); }
// Reset button state if (submitButton) { submitButton.disabled = false; submitButton.textContent = 'Send Message'; }});</script>This script:
- Prevents the default form submission
- Shows a loading state while the form is being processed
- Handles both success and error states
- Resets the form on successful submission
Testing and Deploying Your Google Sheets Integration
- Run the AstroJS server in development mode and submit the form.
npm run dev- Open the Google Sheet and see the form data. You should see your form submission appear in the sheet with all fields properly populated.
Deploying to Production
- Add your new environment variables to your hosting provider.
Most hosting platforms like Vercel, Netlify, or Cloudflare Pages have a section in their dashboard for environment variables. Make sure to add all the variables from your .env file.
Security Best Practices for Google Sheets Integration
- Never expose your private credentials in client-side code
- Use server-side validation to prevent malicious data
- Consider implementing rate limiting to prevent form spam
- Regularly rotate your service account keys
Extending Your Google Sheets Form Solution
- Add email notifications when new form submissions arrive
- Create different sheets for different types of forms
- Implement custom formatting or data processing before storage
- Add analytics tracking for form submissions
- Build an admin dashboard to view recent submissions
Google Sheets provides a flexible, accessible way to store form data without the complexity of a traditional database. For most small to medium websites, this solution offers the perfect balance of simplicity and functionality.
Related Articles

How To Create A Secure Staging Environment For Cloudflare Pages
Testing website changes before they go live is essential for maintaining a professional online presence. Learn how to create a secure, password-protected staging environment for your Cloudflare Pages site.

How To Redirect .pages.dev to Your Domain
Learn how to redirect .pages.dev to your domain with this step-by-step guide

Schedule Cloudflare Pages Builds
Schedule your Cloudflare Pages builds to run at specific times. No external services needed.

Fix Bad Indentation Of A Mapping Entry Error In Astro
Troubleshoot and resolve the common "bad indentation of a mapping entry" error in AstroJS with this practical guide.