
How To Create A Secure Staging Environment For Cloudflare Pages
Testing website changes before they go live is essential for maintaining a professional online presence. Learn how to create a secure, password-protected staging environment for your Cloudflare Pages site.
Published on:Why You Need A Staging Environment
-
Test new features without affecting live users
-
Check mobile browser compatibility
-
Catch bugs and issues before they impact your production site
-
Allow clients and team members to review changes before approval
-
Maintain SEO rankings by preventing search engines from indexing test content
Cloudflare Pages makes setting up a staging environment straightforward, but there are important security considerations to address. This guide covers everything you need to create a secure, professional staging setup.
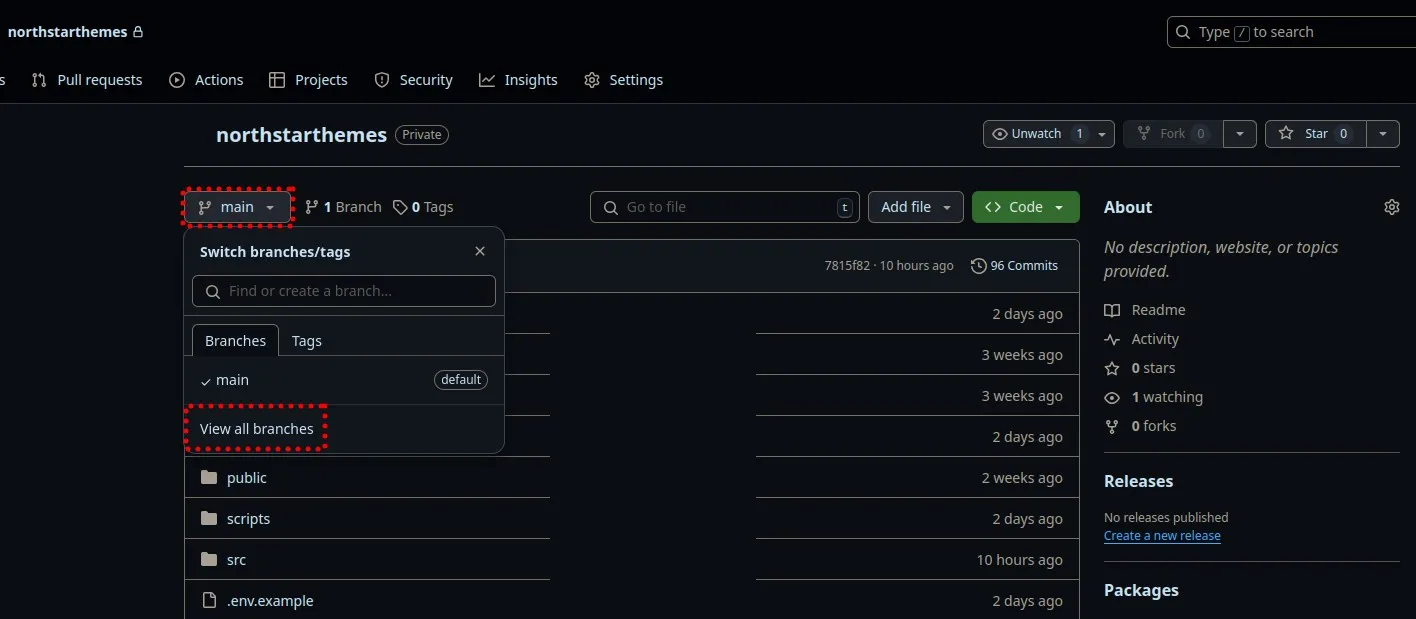
Creating A Staging Branch In GitHub
- Log in to GitHub and navigate to your repository
- Click on the “main” branch dropdown (top left of the repository)
- Click “View all branches”
- Click “New branch”
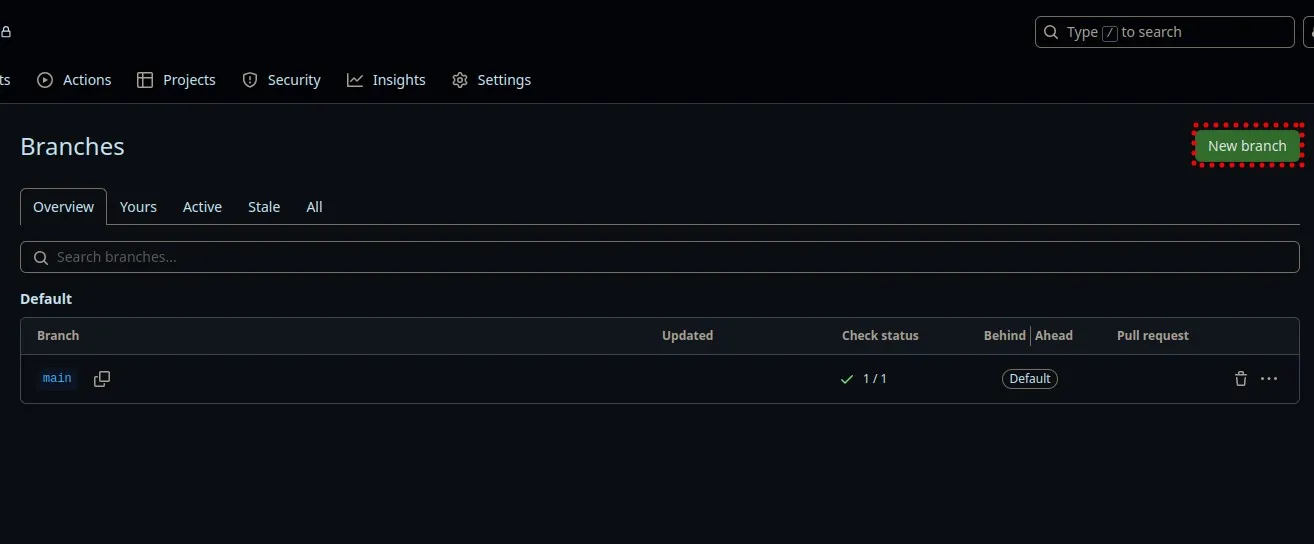
- Name your branch “staging” and create it from your main branch
This branch will serve as the source for your staging environment. Any changes pushed to this branch will automatically deploy to your staging site.
Configuring Cloudflare Pages For Staging
Setting Up Branch Controls
- Log in to your Cloudflare dashboard
- Navigate to “Workers & Pages”
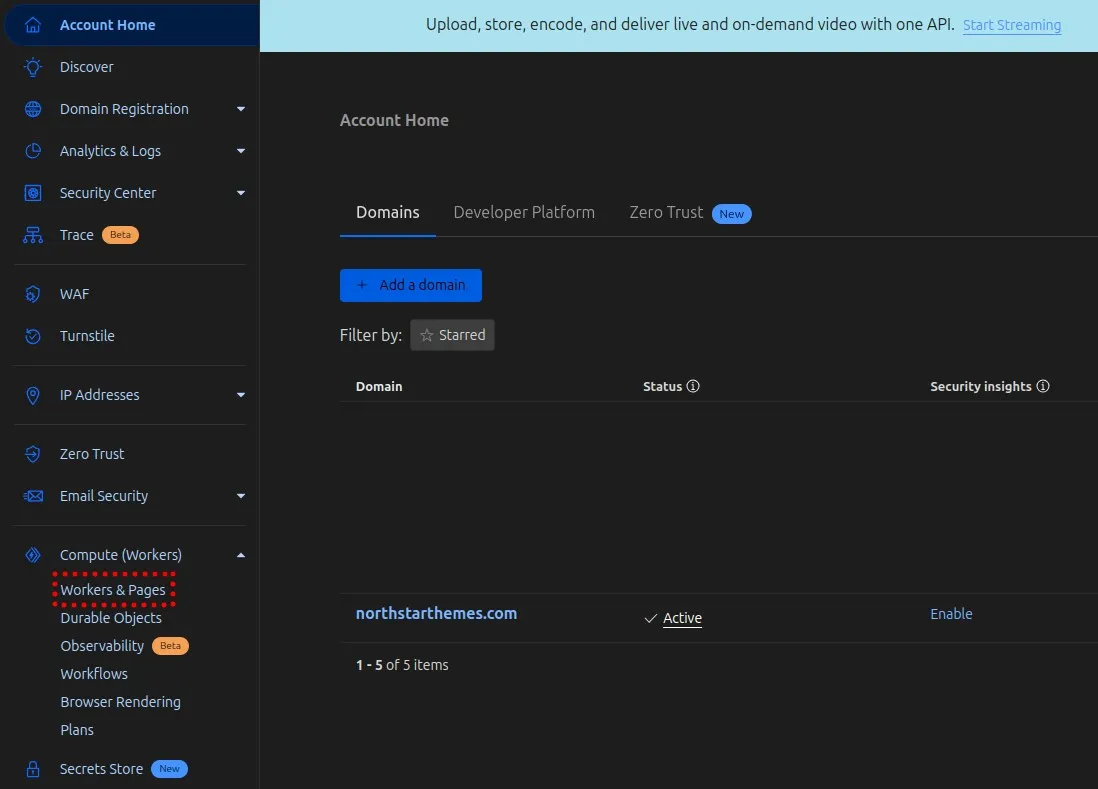
- Select your Pages project
- You should see a new preview deployment (likely failed due to missing environment variables)
- Go to “Settings”
- Make sure “Preview” is selected in the “Environment” dropdown
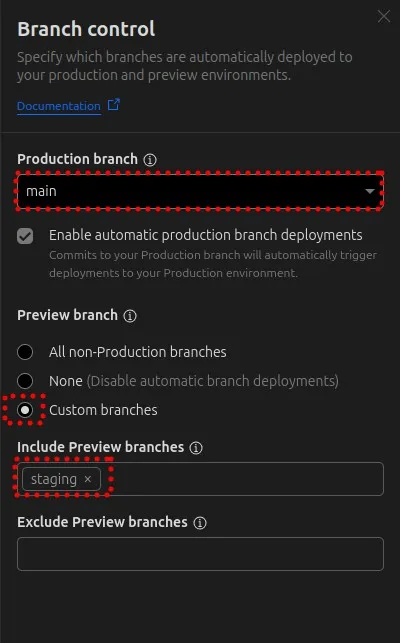
- Click on the “Edit branch control” button

- In the branch control editor make sure the production branch is set to “main” or “master”
- For preview branch, select “custom branches” and under include type in “staging”
- Click save
For more details on preview environments you can check out the Cloudflare Pages documentation.
Adding Environment Variables
Your staging environment needs the same environment variables as production. If you plan to use a different database for staging you will need to add the database credentials as environment variables.
- Still in the Settings tab, scroll to “Environment variables”
- Click “Add variable”
- Make sure to select “Preview” environment when adding variables
- Save your changes
If you retry the deployment now, your staging site will be publicly accessible and indexable by search engines. Let’s fix that.
Preventing Search Engine Indexing
To keep search engines from indexing your staging site we need to add a “noindex” header to the response.
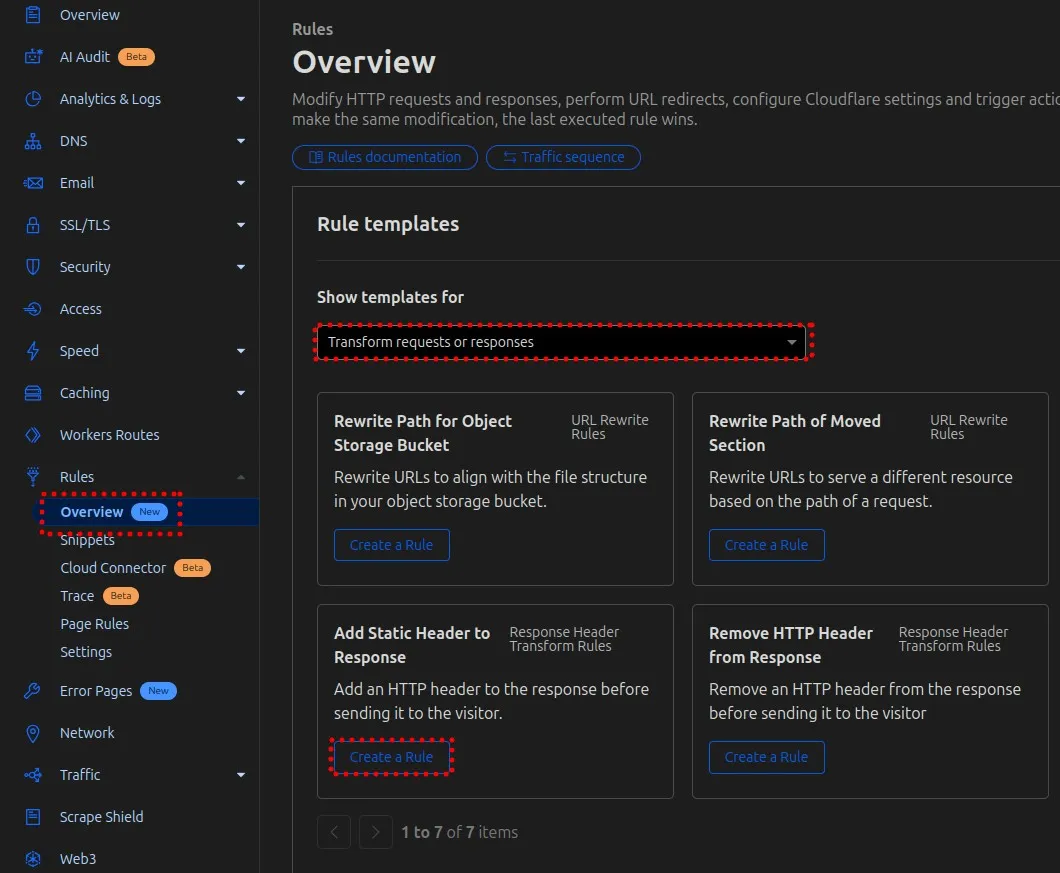
- In your Cloudflare dashboard, go to “Rules” > “Overview”
- In the dropdown “Show Templates For” select “Transform Reuests or Responses”
- Click “create rule” on the template named “Add static header to response”
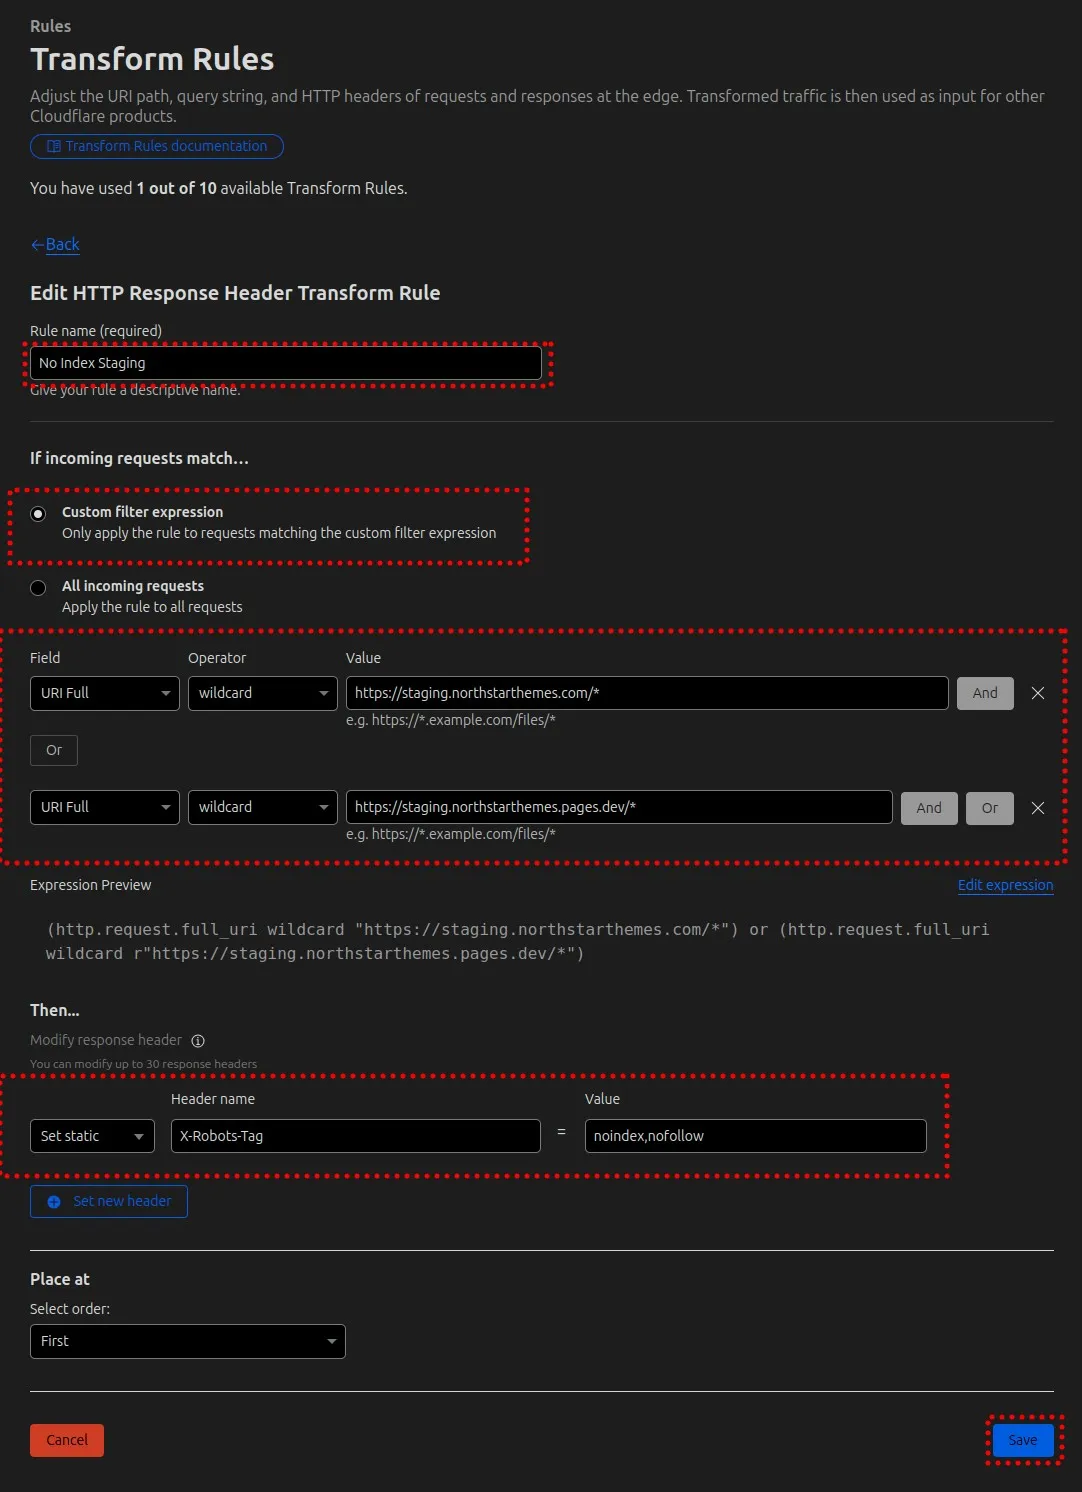
- Name your rule (e.g., “Add noindex to staging”)
- Select “custom filter expression”
- Set the following conditions:
- Field: “URI Full”
- Operator: “wildcard”
- Value:
http://staging.yourdomain.com/*(your staging domain)
- Add another condition with OR operator:
- Field: “URI Full”
- Operator: “wildcard”
- Value:
http://staging.yourdomain.pages.dev/*
- Under “Then…”, select “Set static” for the action
- Header name: “X-Robots-Tag” (Make sure it’s capitalized)
- Value: “noindex, nofollow”
- Click “Save”
Limited Time Launch Sale
Check out our AstroJS starter template and get your site up and running in a day.
GET 60% OFF!Setting Up A Custom Domain For Staging
Now let’s create a custom subdomain for your staging site:
- Go back to your Pages project and click on the “Custom domains” tab and “Add custom domain”
- Enter
staging.yourdomain.comand click “Continue” - Confirm

- Click “Check DNS records”
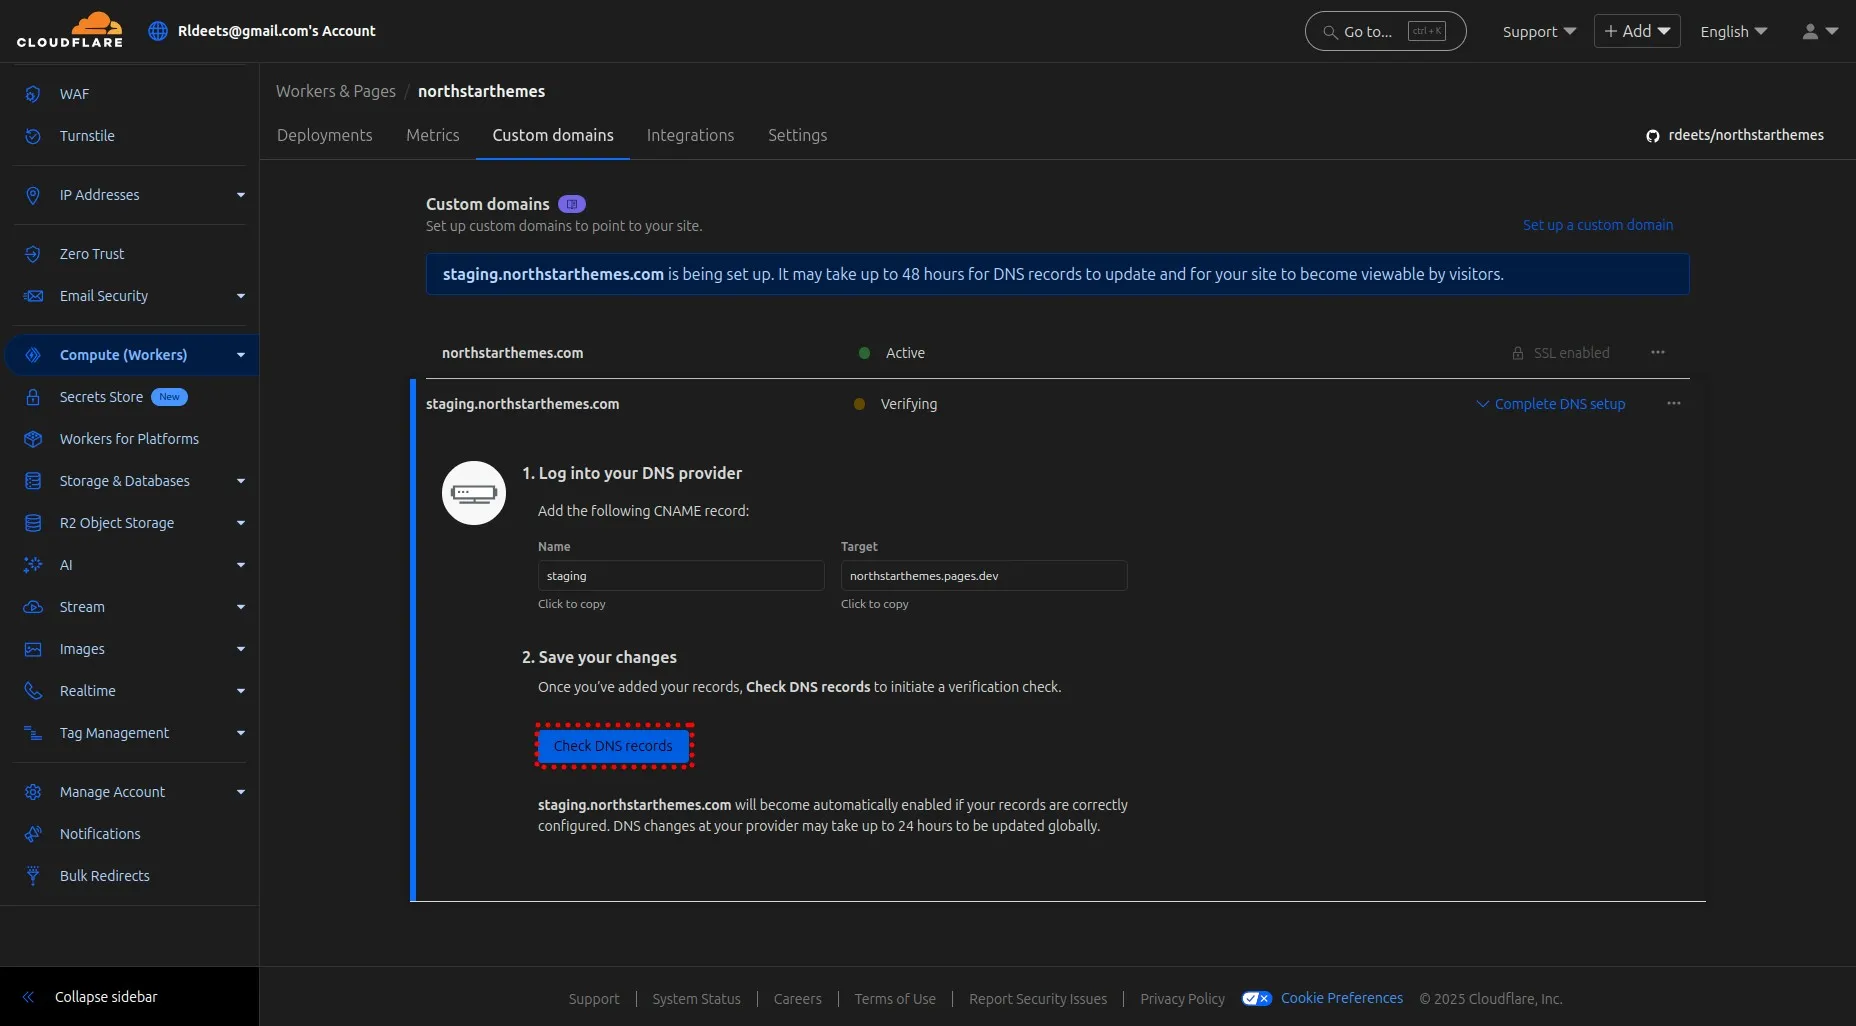
- Go to “DNS” in your Cloudflare dashboard
- Verify that you have a CNAME record for your domain
- Type: “CNAME”
- Name: “staging”
- Target: “staging.yourdomain.pages.dev” (your Pages staging domain)
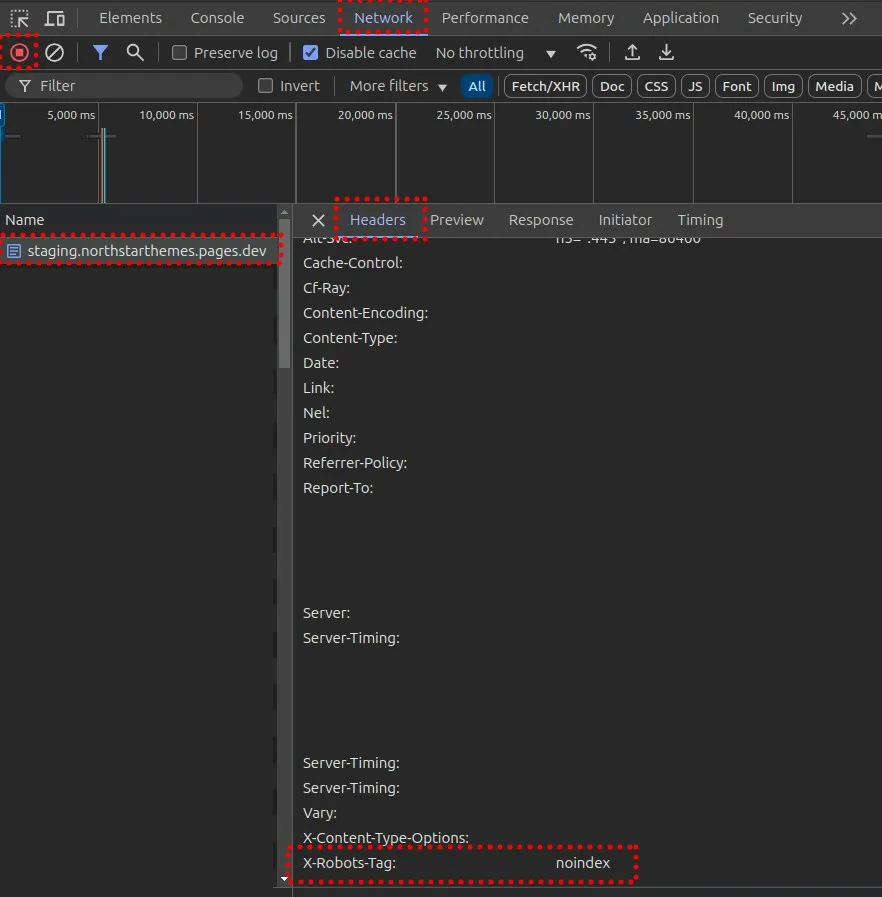
Now retry the deployment and open the staging preview URL. To verify the noindex tag is working:
- Open browser developer tools
- Go to the Network tab and refresh the page
- Click on the main document request
- Check that response headers include “X-Robots-Tag: noindex, nofollow”
Password Protecting Your Staging Site
For additional security, let’s add password protection. There are two approaches:
Option 1: Using Cloudflare Workers
- In your Cloudflare dashboard, go to “Workers & Pages”
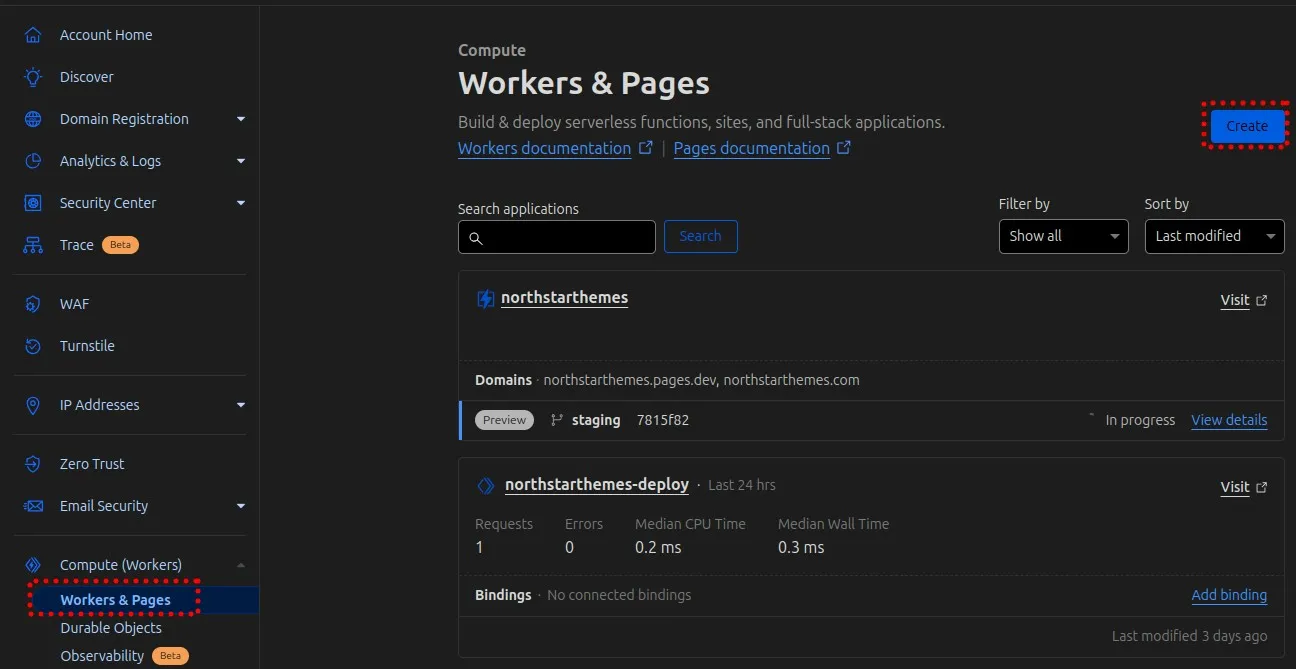
- Click “Create a Service” > “Create Worker” and select the “Hello World” option
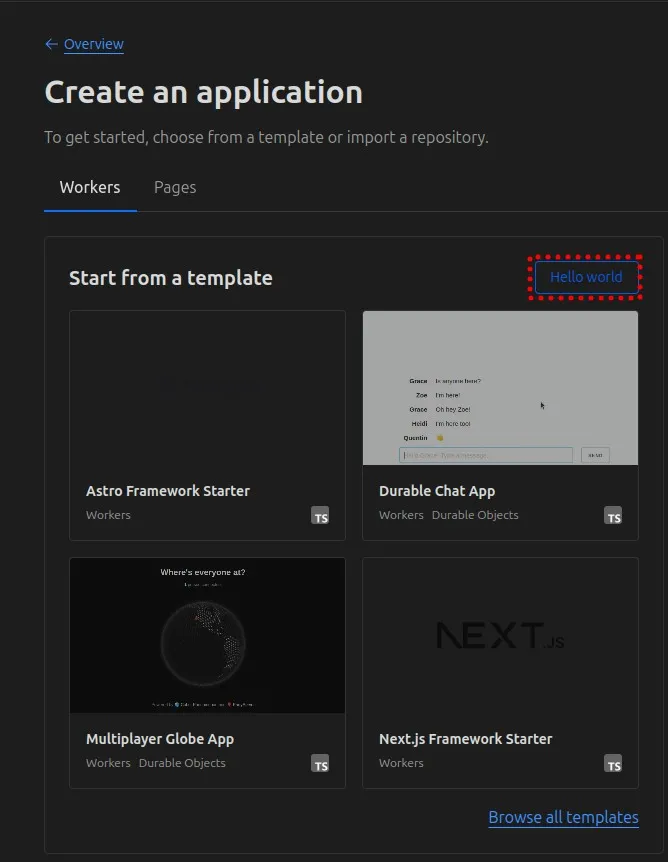
- Click Edit Code
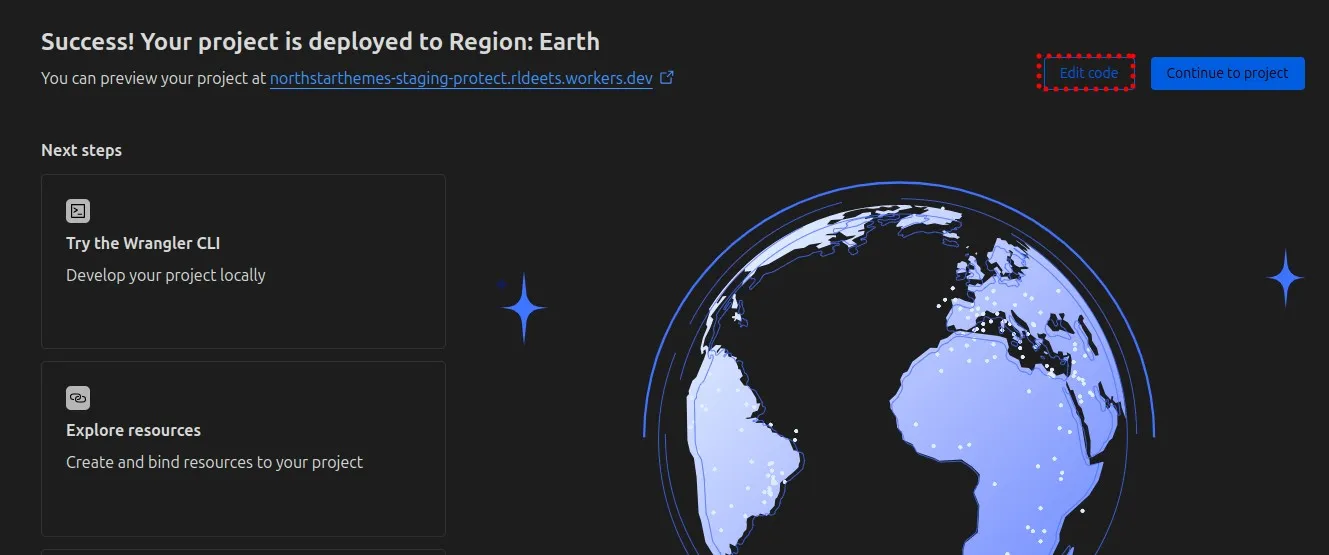
- Replace the default code with this authentication code, thank you to Max Ivanov for the code
- Change the username and password to your desired values
const USERNAME = 'demouser';const PASSWORD = 'demopassword';const REALM = 'Secure Area';
addEventListener('fetch', (event) => { event.respondWith(handleRequest(event.request));});
async function handleRequest(request) { const authorization = request.headers.get('authorization'); if (!request.headers.has('authorization')) { return getUnauthorizedResponse('Provide User Name and Password to access this page.'); } const credentials = parseCredentials(authorization); if (credentials[0] !== USERNAME || credentials[1] !== PASSWORD) { return getUnauthorizedResponse('The User Name and Password combination you have entered is invalid.'); } return await fetch(request);}
function parseCredentials(authorization) { const parts = authorization.split(' '); const plainAuth = atob(parts[1]); const credentials = plainAuth.split(':'); return credentials;}
function getUnauthorizedResponse(message) { let response = new Response(message, { status: 401, }); response.headers.set('WWW-Authenticate', `Basic realm="${REALM}"`); return response;}- Deploy the worker
- Go to the worker’s “Settings” tab
- Make sure the workers.dev and preview URLs are disabled
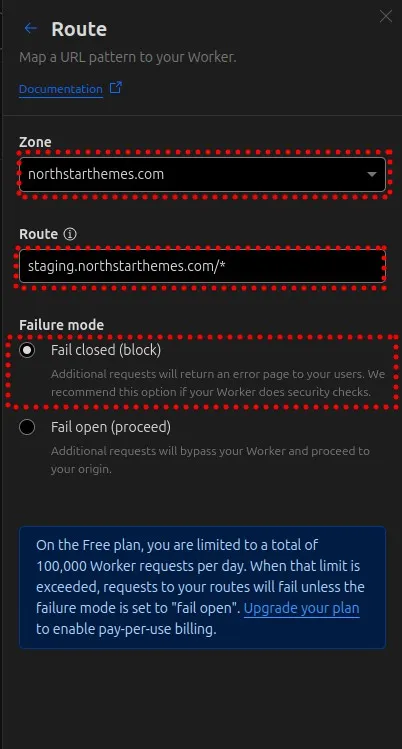
- Under “Routes”, click “Add route”
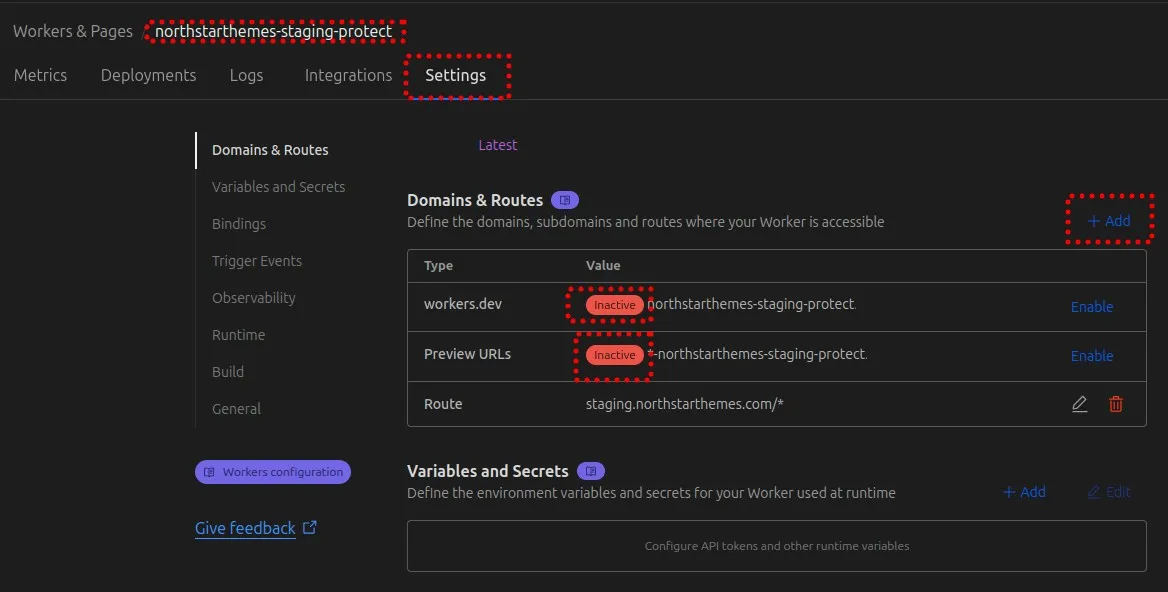
- Set the zone to the current project
- Route: “staging.yourdomain.com/*”
- Failure mode closed block
- Save
Redirecting pages.dev URLs
The *.pages.dev domain can’t be password-protected via Workers directly. To handle this we will redirect the pages.dev URLs to the custom domain:
- Go to “Rules” > “Bulk Redirects”
- Click “Add redirects” > “Manually add redirects”
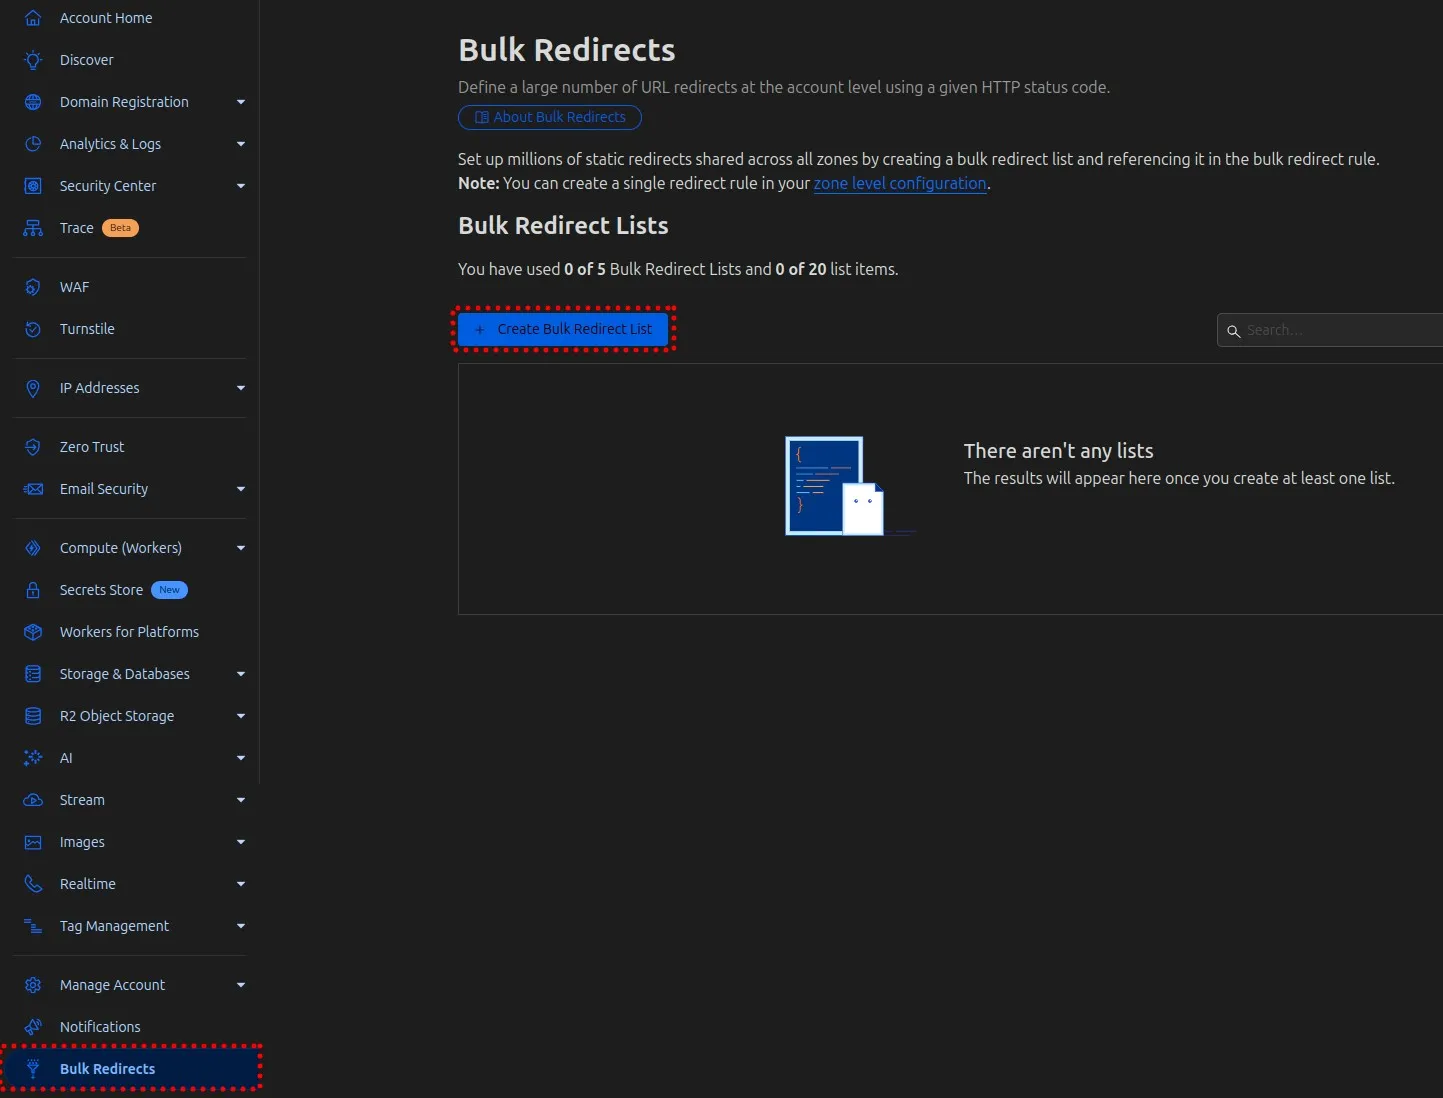
- Add two new redirect URLs
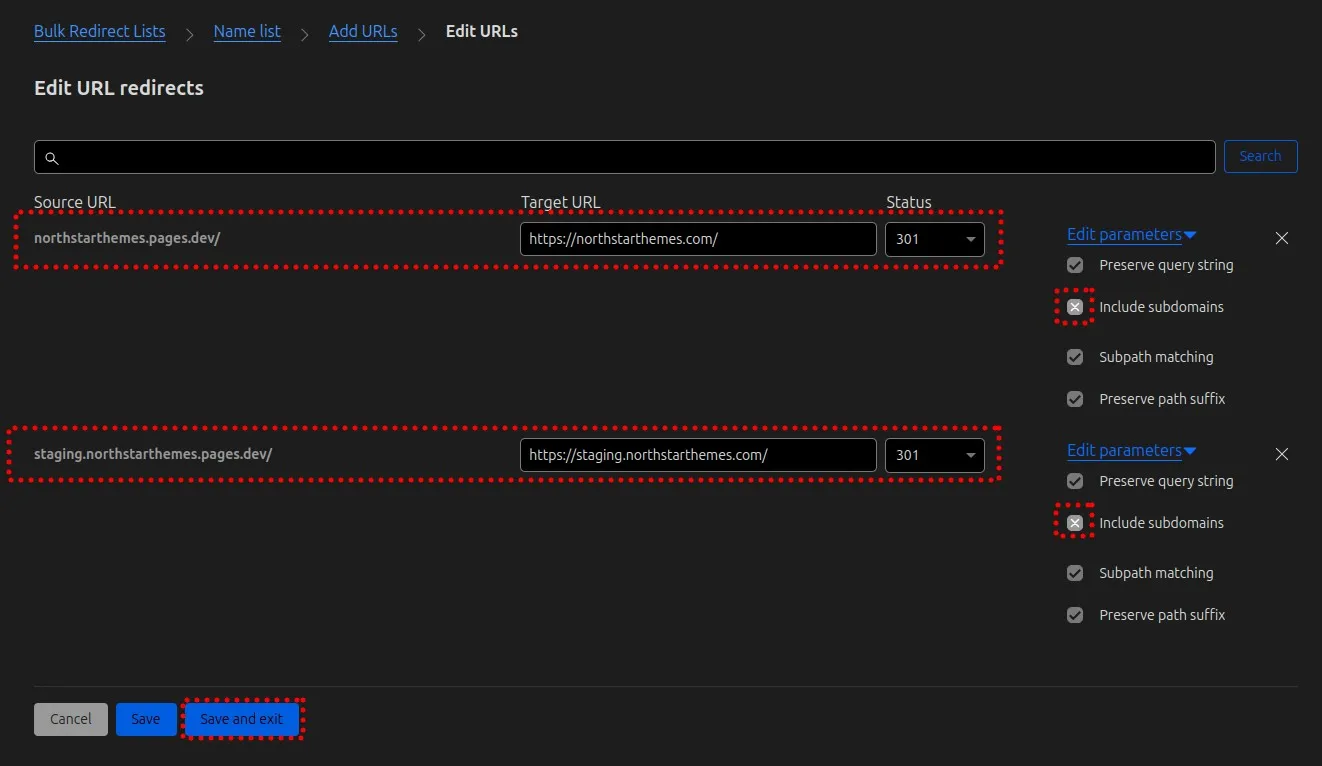
- redirect 1
- Source URL:
yourdomain.pages.dev/ - Target URL:
https://yourdomain.com/ - Status code: 301 (Permanent redirect)
- Check all boxes under “edit parameters” except “Include Subdomains”
- Source URL:
- redirect 2
- Source URL:
staging.yourdomain.pages.dev/ - Target URL:
https://staging.yourdomain.com/ - Status code: 301 (Permanent redirect)
- Check all boxes under “edit parameters” except “Include Subdomains”
- Source URL:
- redirect 1
- Save and exit
Option 2: Setting Up Cloudflare Access Zero Trust
This is outside the scope of this guide, please refer to the Cloudflare Access documentation for more information. I chose to use the workers method because it doesn’t require a payment method to set up.
Testing Your Staging Environment
- Push changes to your staging branch in GitHub
- Wait for Cloudflare Pages to deploy the changes
- Visit staging.yourdomain.com
- Enter the username and password when prompted
- Verify your changes appear correctly
- Check that the noindex header is present
Your staging site is now secure, protected from search engines, and requires authentication to access.
Best Practices For Using Your Staging Environment
-
Always test changes in staging before merging to main
-
Create a pull request workflow that requires staging approval
-
Consider automating visual regression tests between staging and production
-
Document the staging URL and credentials for your team
With this setup, you can confidently test changes, gather feedback, and maintain a professional production environment without worrying about unfinished work being visible to the public.
Related Articles

How To Redirect .pages.dev to Your Domain
Learn how to redirect .pages.dev to your domain with this step-by-step guide

Schedule Cloudflare Pages Builds
Schedule your Cloudflare Pages builds to run at specific times. No external services needed.

Fix Bad Indentation Of A Mapping Entry Error In Astro
Troubleshoot and resolve the common "bad indentation of a mapping entry" error in AstroJS with this practical guide.

Submit Your AstroJS Sitemap to Google Search Console
Submitting your AstroJS sitemap to Google Search Console is essential for ensuring your website gets properly indexed and ranks well in search results.